15 Framer Shortcuts and Tips to Supercharge Your Design Workflow
Last Updated on:
Author:
Framerbite
Framerbite

Are you spending too much time clicking through menus in Framer? Whether you're a seasoned designer or just getting started with Framer, mastering keyboard shortcuts and productivity tips can dramatically speed up your workflow. In this comprehensive guide, we'll explore 15 game-changing Framer shortcuts and tips that will help you design more efficiently and unlock the full potential of this powerful design tool.
Why Framer Shortcuts Matter
Before diving into the shortcuts, let's understand why they're crucial for your design productivity. Professional designers can save hours each week by incorporating keyboard shortcuts into their workflow. When you're designing interactive prototypes and websites in Framer, every second counts. These shortcuts will help you maintain your creative flow without constantly switching between your keyboard and mouse.
Essential Framer Keyboard Shortcuts
1. Quick Frame Creation (F)
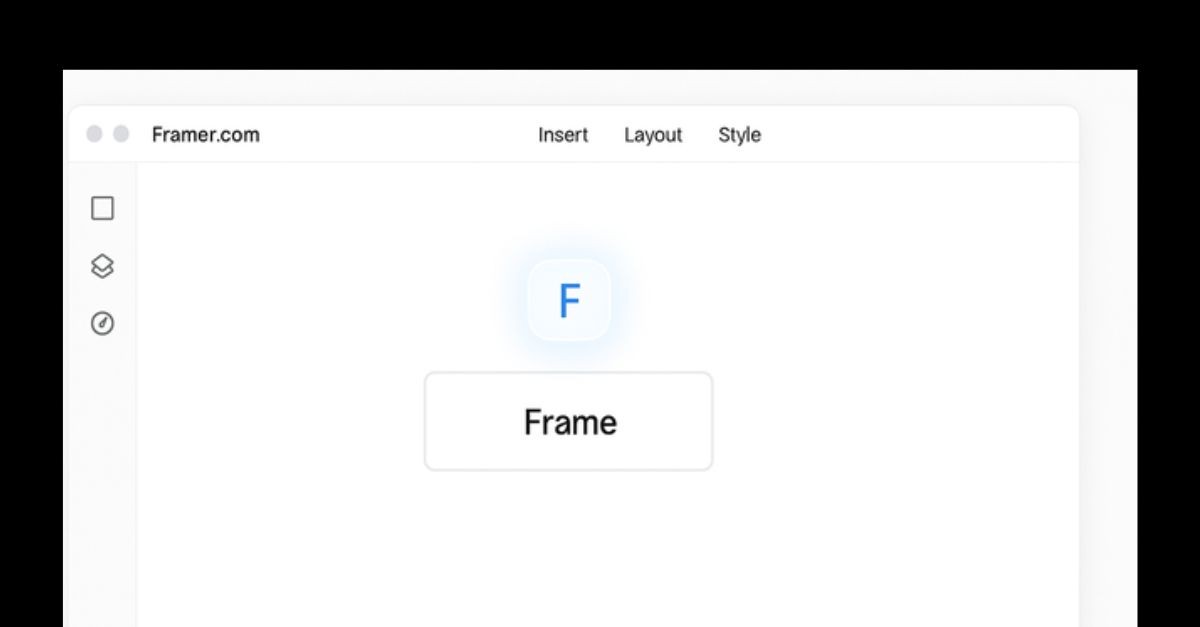
Generates a frame immediately - a frame is a kind of container or shape to insert things like texts, images and so forth.
How to use:
Press F on your keyboard.
Drag and click on your canvas to establish the frame dimensions.
Or tap once to create a frame with the default size.
Pro Tip:
Shift-drag to draw a frame in the shape of a perfect square.
2. Text Tool Shortcut (T)
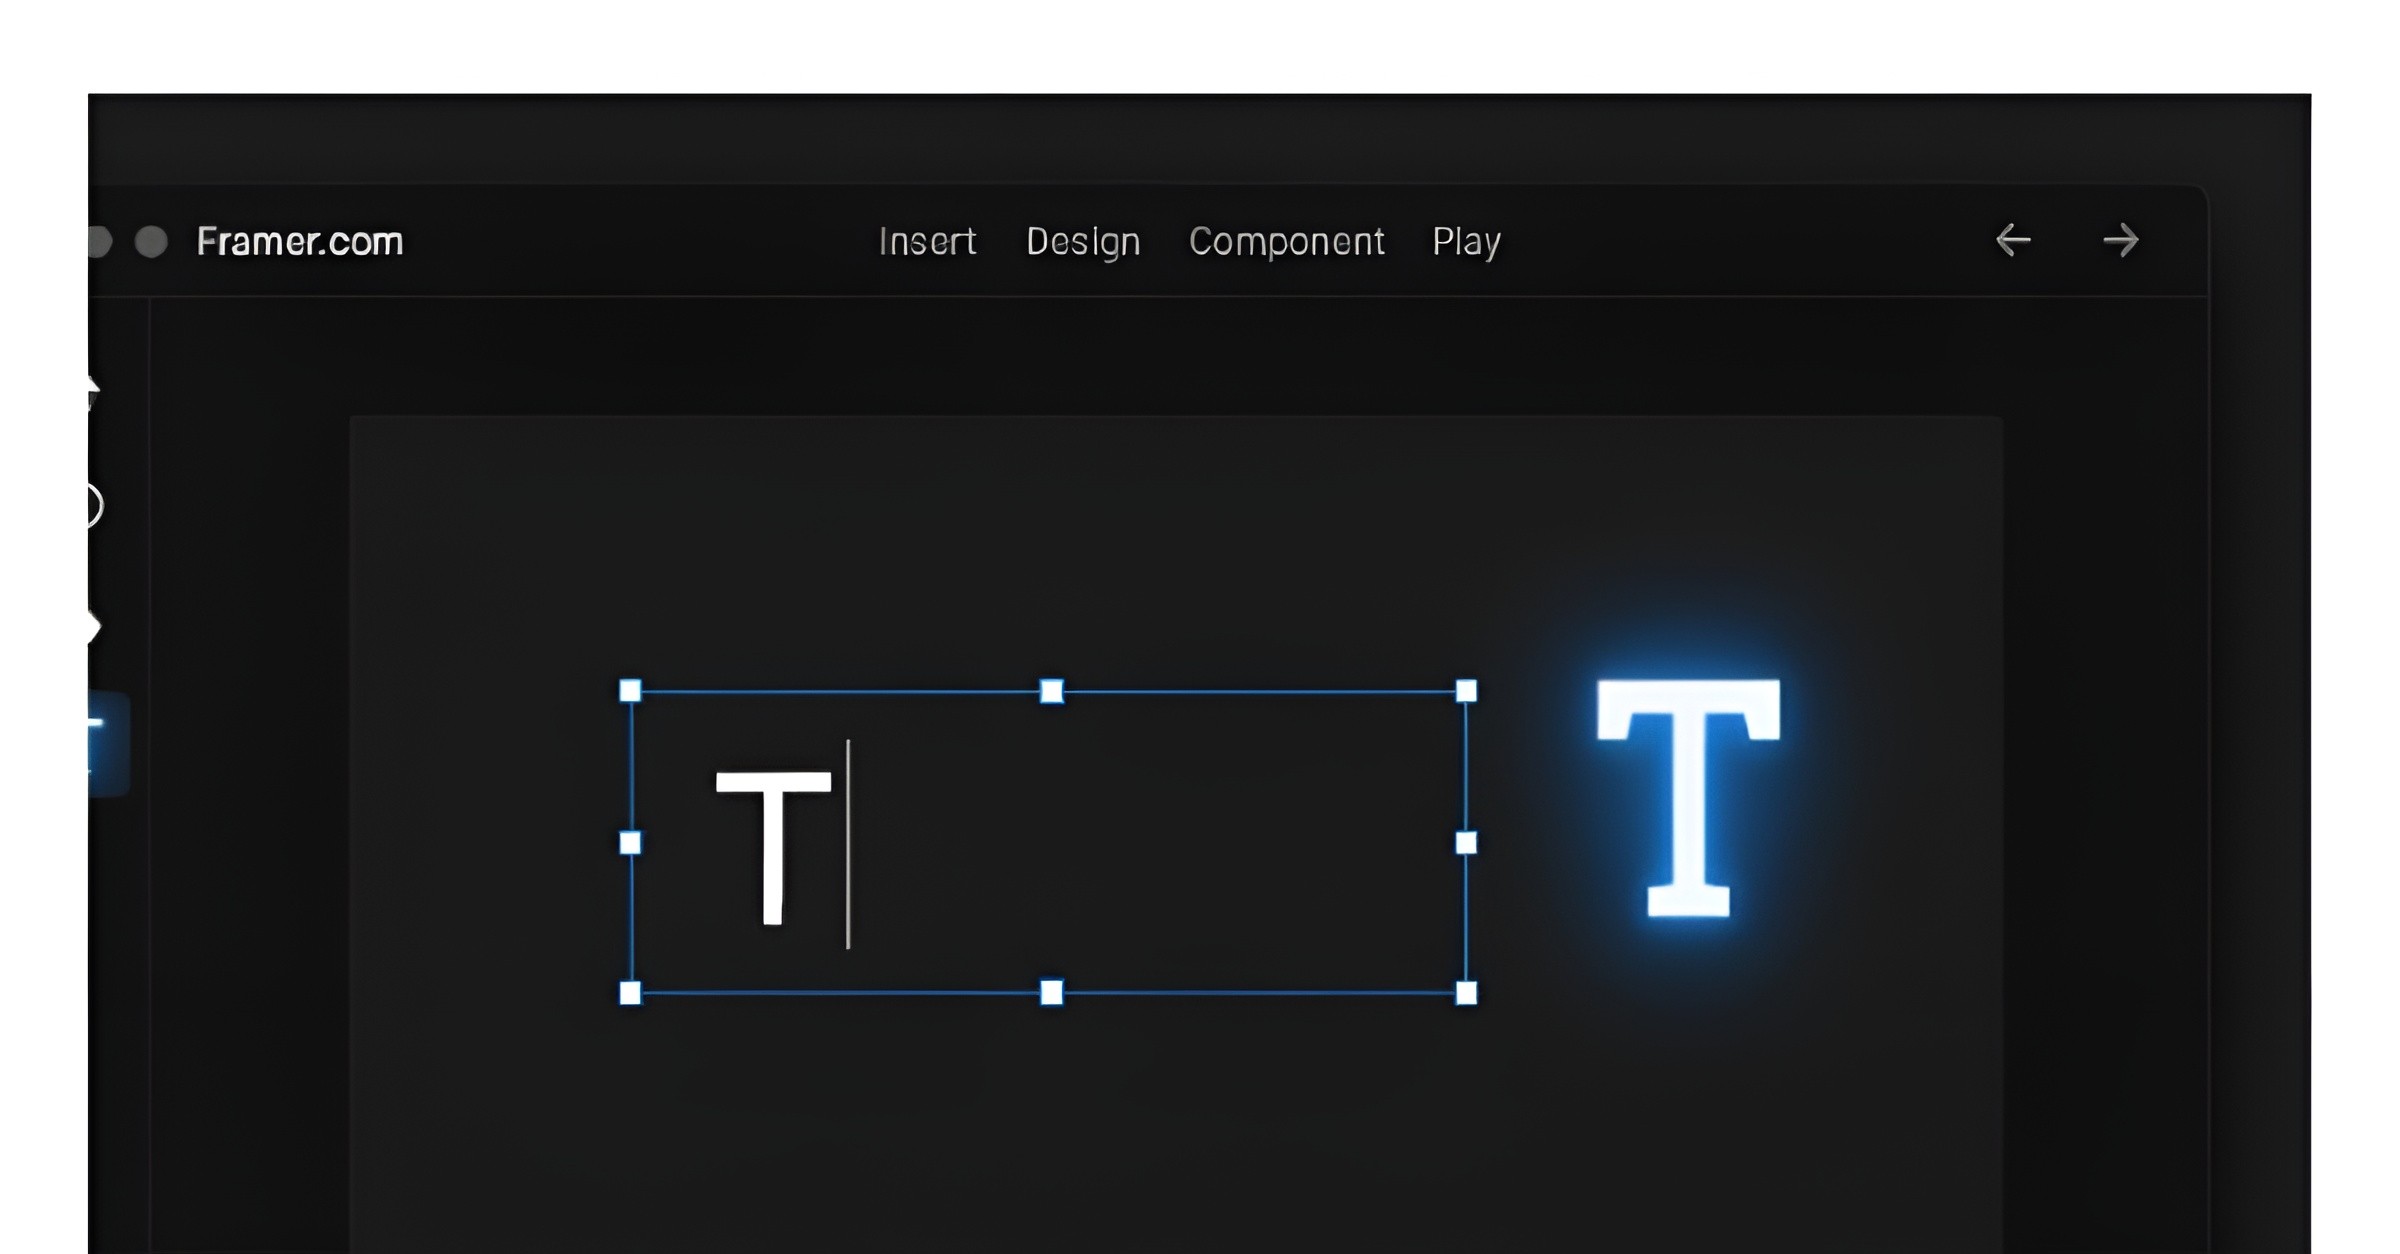
Need to add text quickly? Press T to activate the text tool. You may style your text font, size, color from the properties panel.
How to use it:
Click T to change back on the text plot.
Click anywhere on the canvas to paste in your text.
Begin typing Framer will automatically make a text box for you.
Why it’s useful: Instead of manually adding text layers from the toolbar, you can just press T, click, and start typing- it saves time and keeps your design flow going.
Example: You’re building a landing page. You press T, click once, and type “Welcome to Our Product” Then, press T again to add a subheading like “Built for speed and creativity.”
3. Duplicate with Precision (Cmd/Ctrl + D)
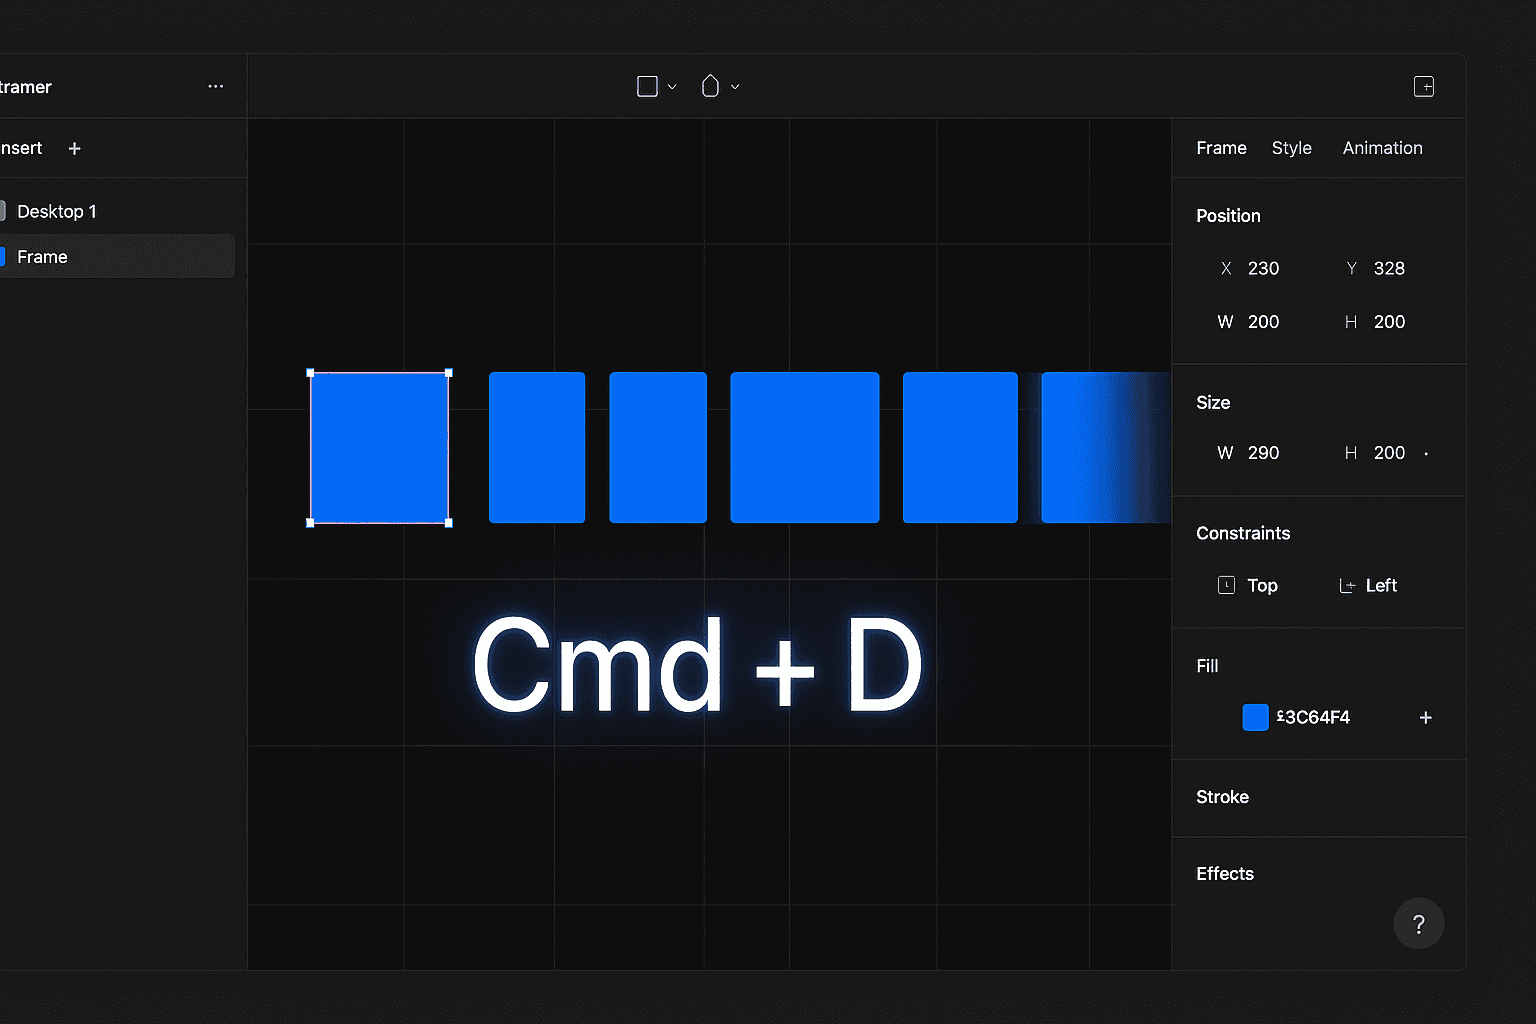
Shortcut:
Mac: Cmd + D
Windows: Ctrl + D
This does duplicate the currently selected element making an exact copy of it.
How to use it:
Select any layer like a button or text block.
Press Cmd + D (Mac) or Ctrl + D (Windows).
A duplicate will appear right next to your original.
If you move the new copy slightly, Framer remembers that distance.
The next time you press Cmd/Ctrl + D, it will repeat that exact spacing automatically.
Why it’s awesome: It lets you create evenly spaced elements like cards, buttons, or icons super fast.
Pro Tip: After duplicating once, press arrow keys to fine-tune spacing for pixel-perfect layouts.
4. Group Elements Instantly (Cmd/Ctrl + G)
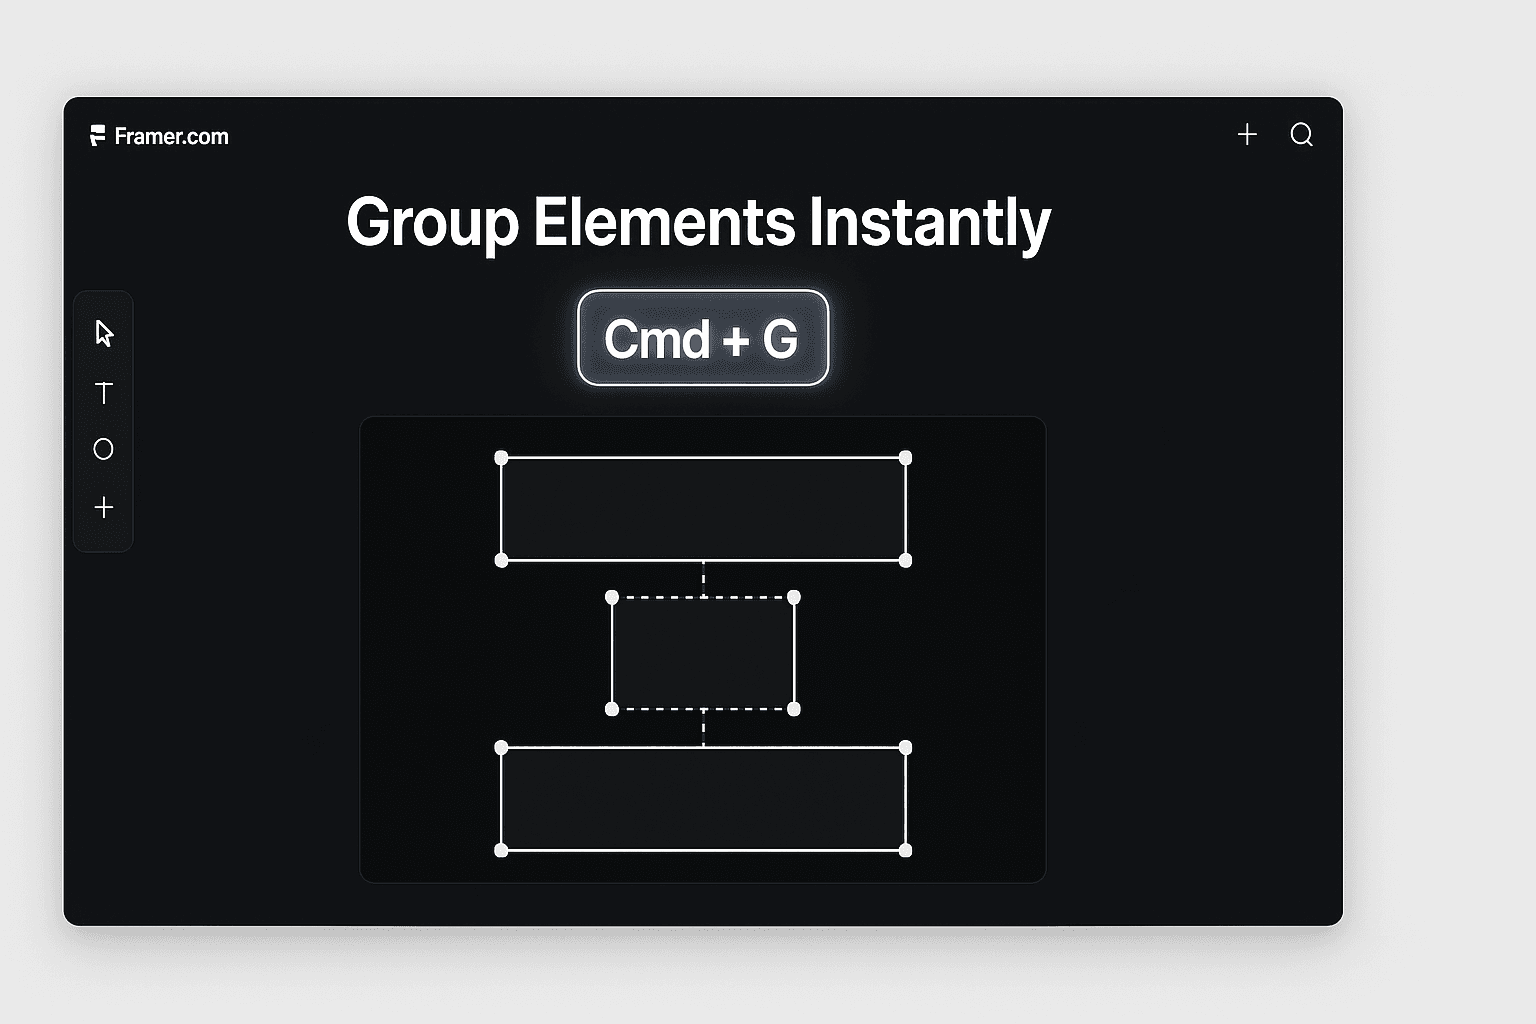
Groups combined layers, meaning you could drag, resize or otherwise manipulate them as a single entity.
How to use this shortcut:
Choose more than one layer (holding Shift and clicking each one).
Hit Cmd/Ctrl + G to group them together.
You should now have one “group” in the Layers panel.
Cmd/Ctrl + G will group them and to ungroup, it is Cmd/Ctrl Shift +G.
Why it’s important: It helps you to have a clean layers panel and makes editing complex designs less painful.
Pro Tip: Clear naming of your groups (“Navbar” or “Hero Section”) keeps your project organized.
Example: You might combine a logo, navigation links and button all together in one "Header Group" so then you can move the entire header as a single block.
5. Toggle Visibility (Cmd/Ctrl + Shift + H)
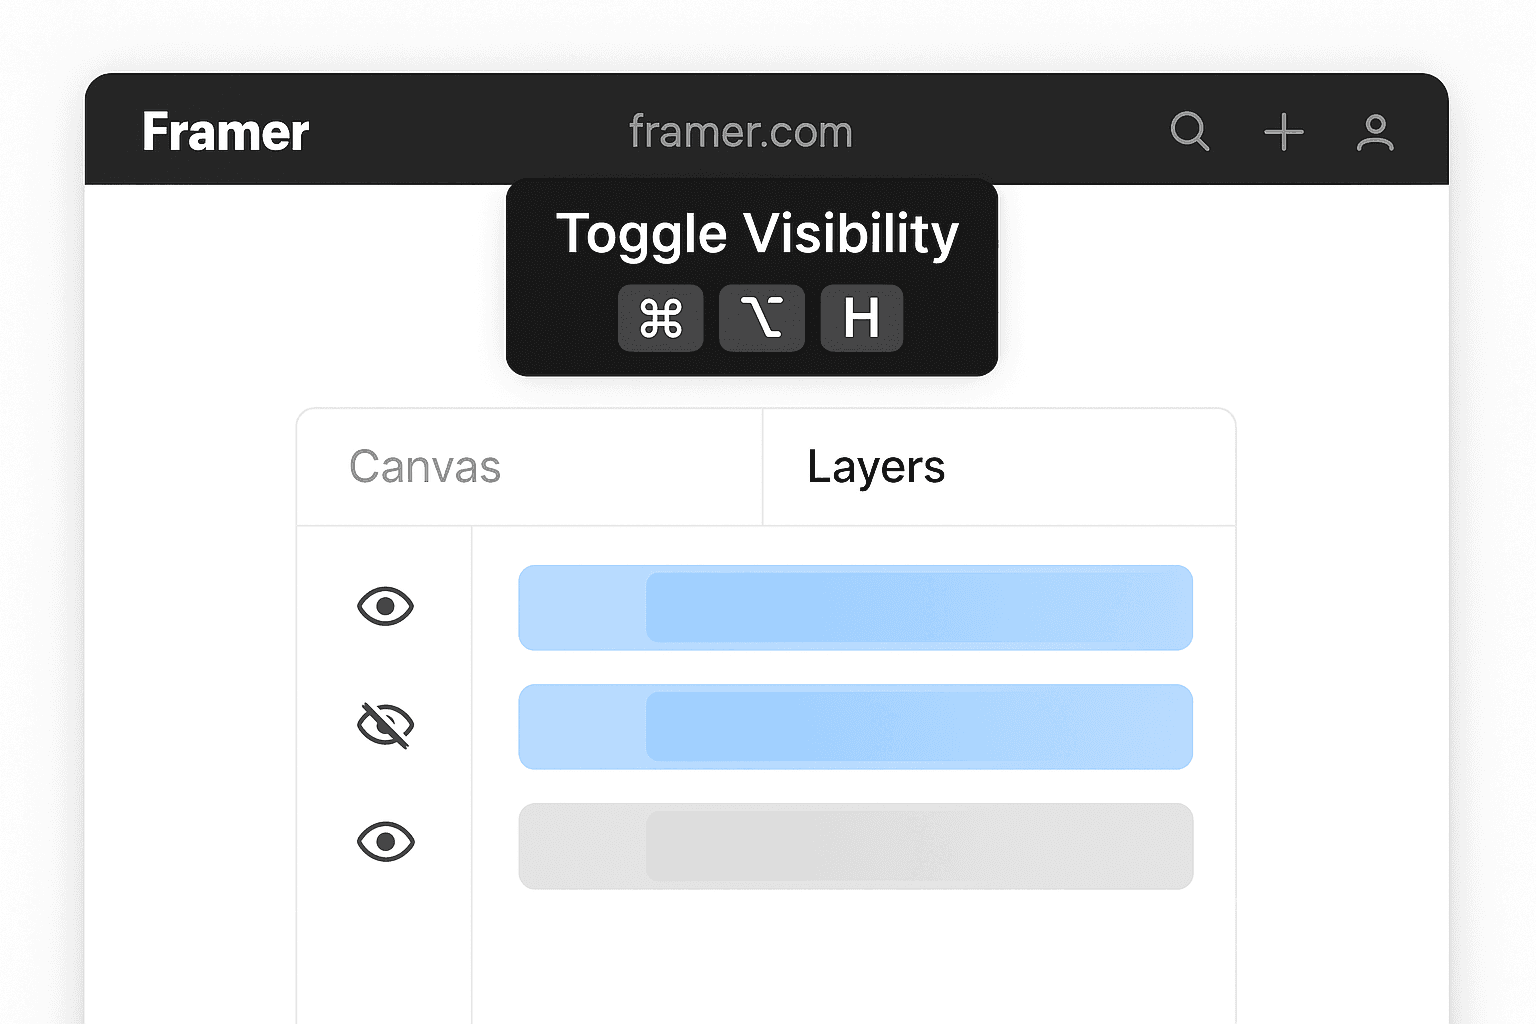
Hide selected layers with Cmd + Shift + H (Mac) or Ctrl + Shift + H (Windows). This is incredibly useful when working with complex designs where you need to temporarily hide elements without deleting them.
Why it’s useful: When you’re working on crowded layouts, hiding certain elements helps you focus on specific areas without clutter.
Example: If you’re designing a popup and it covers your background content, hide the popup with this shortcut while you adjust the layout behind it.
6. Zoom to Fit (Cmd/Ctrl+0)

Press Cmd + 0 (Mac) or Ctrl + 0 (Windows) to fit your entire canvas in the view port. This is perfect for getting an overview of your design or when you need to quickly navigate to different art boards.
When to use it: If you’ve zoomed in too far or lost track of where you are, press this to instantly see everything.
Example: After working closely on a button, press Cmd/Ctrl + 0 to see your entire website layout again.
7. Zoom to Selection (Cmd/Ctrl + 2)

Focus on specific elements by selecting them and pressing Cmd + 2 (Mac) or Ctrl + 2 (Windows). Framer will automatically zoom and center your selected layers, making detailed editing much easier.
How to use it:
Click any object on the canvas.
Press the shortcut.
Framer zooms in and focuses on that element instantly.
Why it helps: It’s perfect for big projects, no more hunting around the canvas to find your selection.
8. Hand Tool for Panning (Space + Drag)
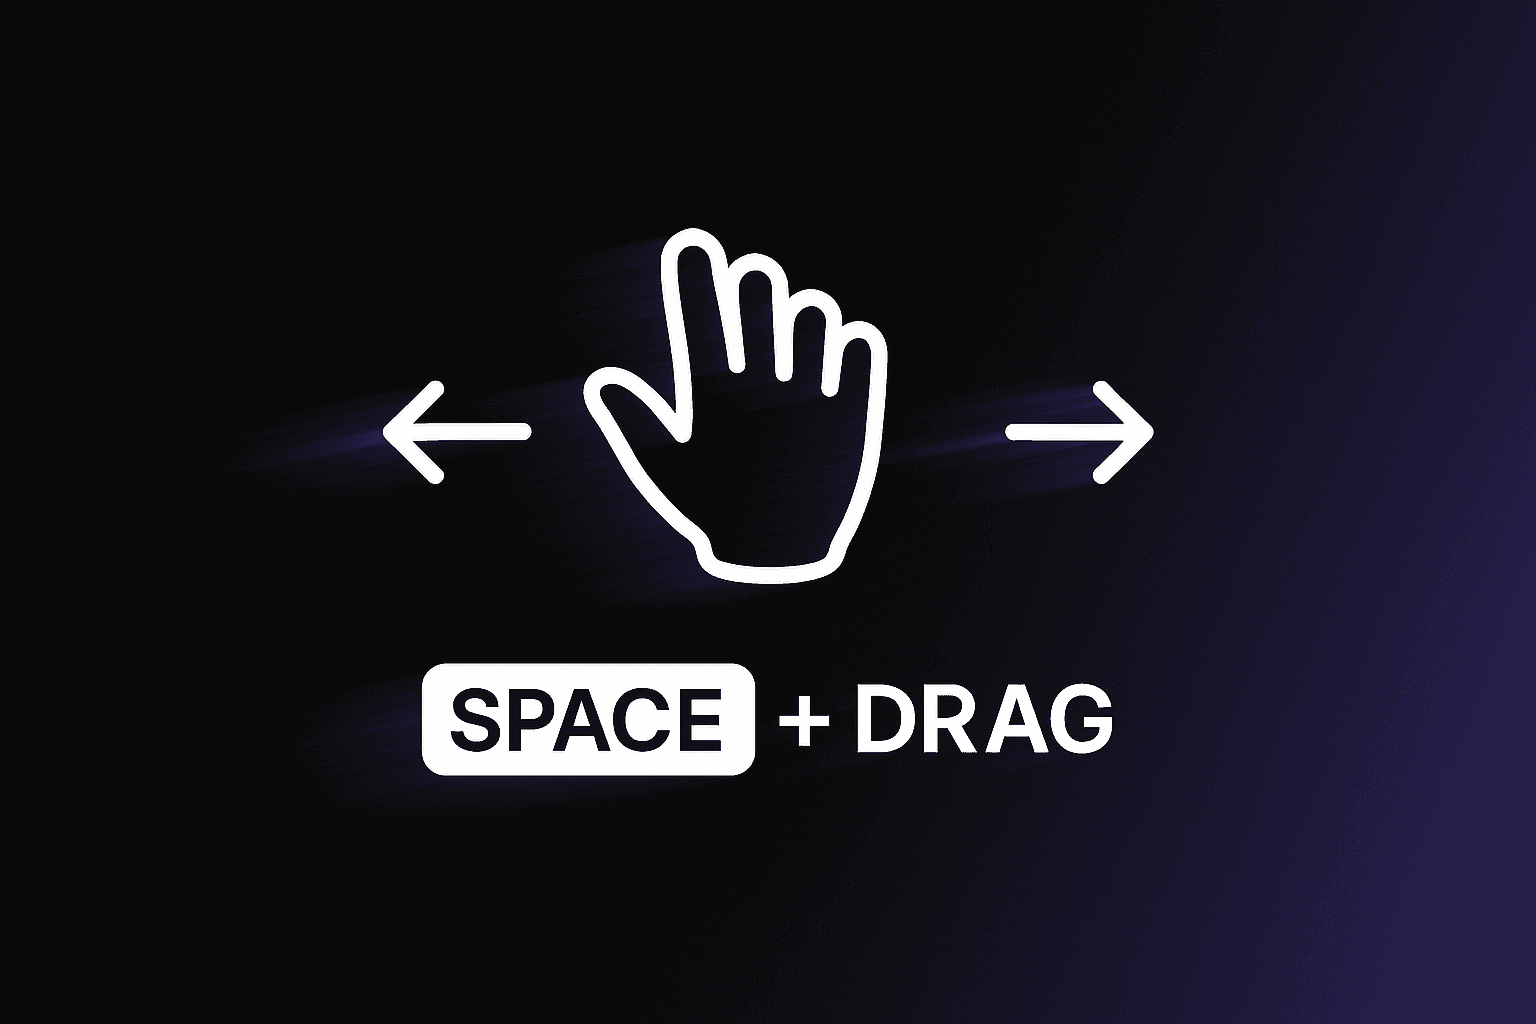
Hold Space and drag to pan around your canvas. This is much faster than using scrollbars and keeps your hand on the keyboard for a smoother workflow.
Example: When you’re zoomed in close on a section of your design and want to look at another part, just hold space and drag, like moving a big sheet of paper around.
Pro Tip: This is smoother and faster than using the scrollbars.
9. Lock Layers (Cmd/Ctrl+L)
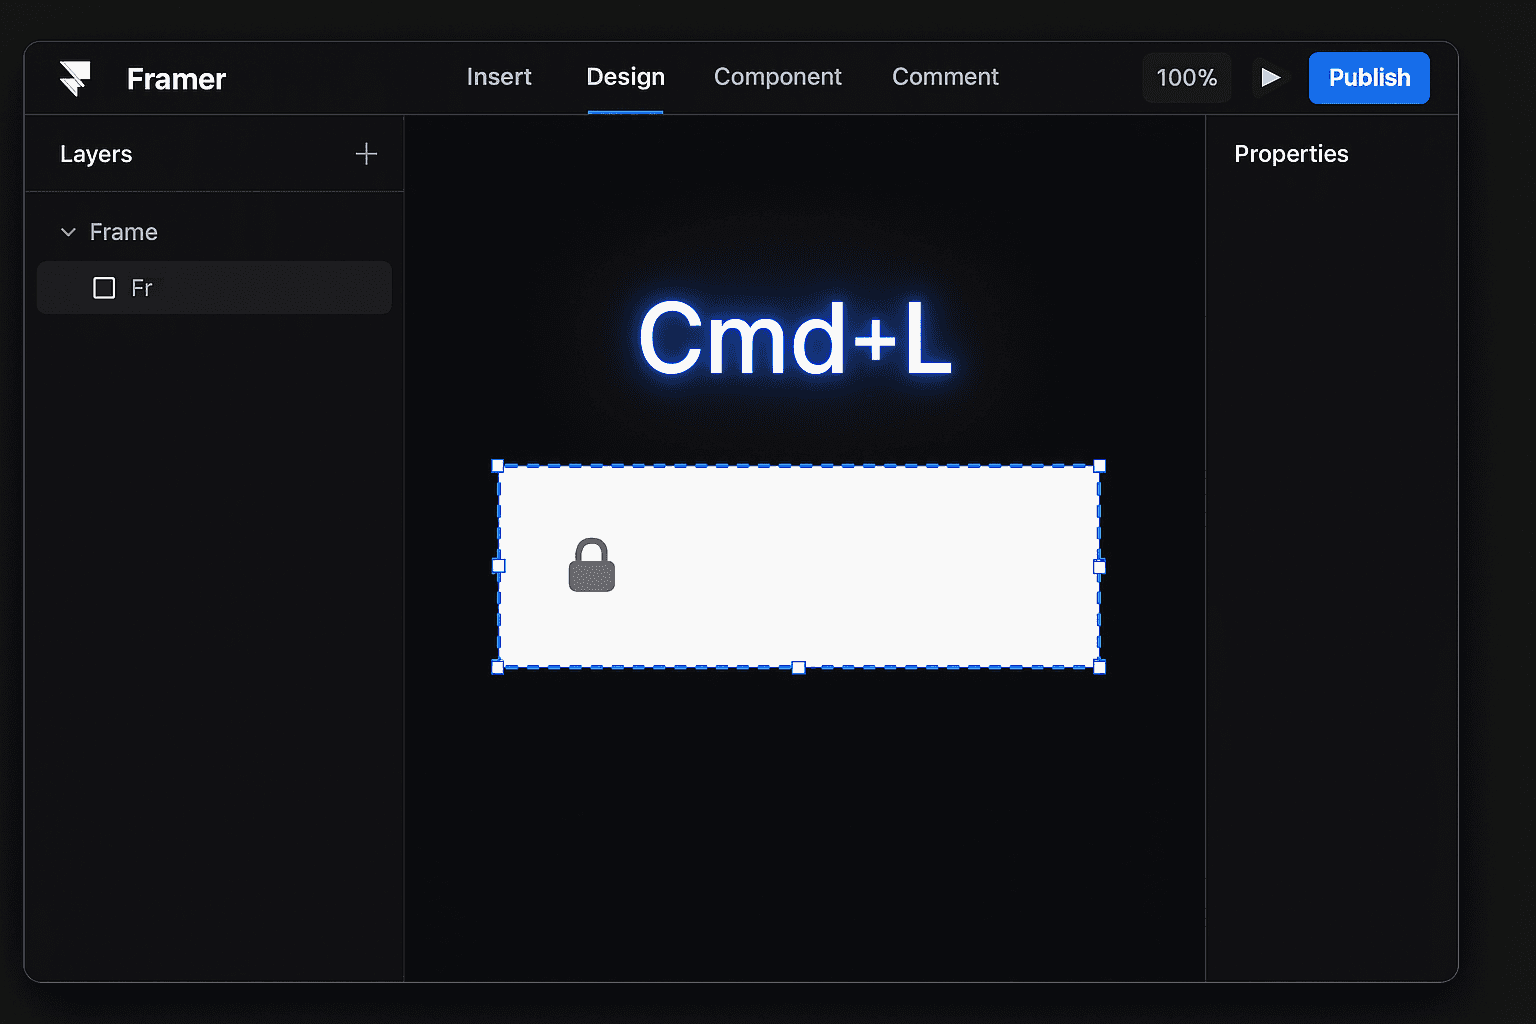
Prevent accidental edits by locking layers with Cmd + L (Mac) or Ctrl + L (Windows). This is especially useful when working with background elements or completed sections of your design. Locks the selected layer so you can’t accidentally move or edit it.
Why it’s useful: It’s great for protecting background layers or completed sections from accidental changes.
Example: Once your background image is perfectly aligned, lock it so it doesn’t move while you edit text above it.
10. Select Parent Layer (Enter)
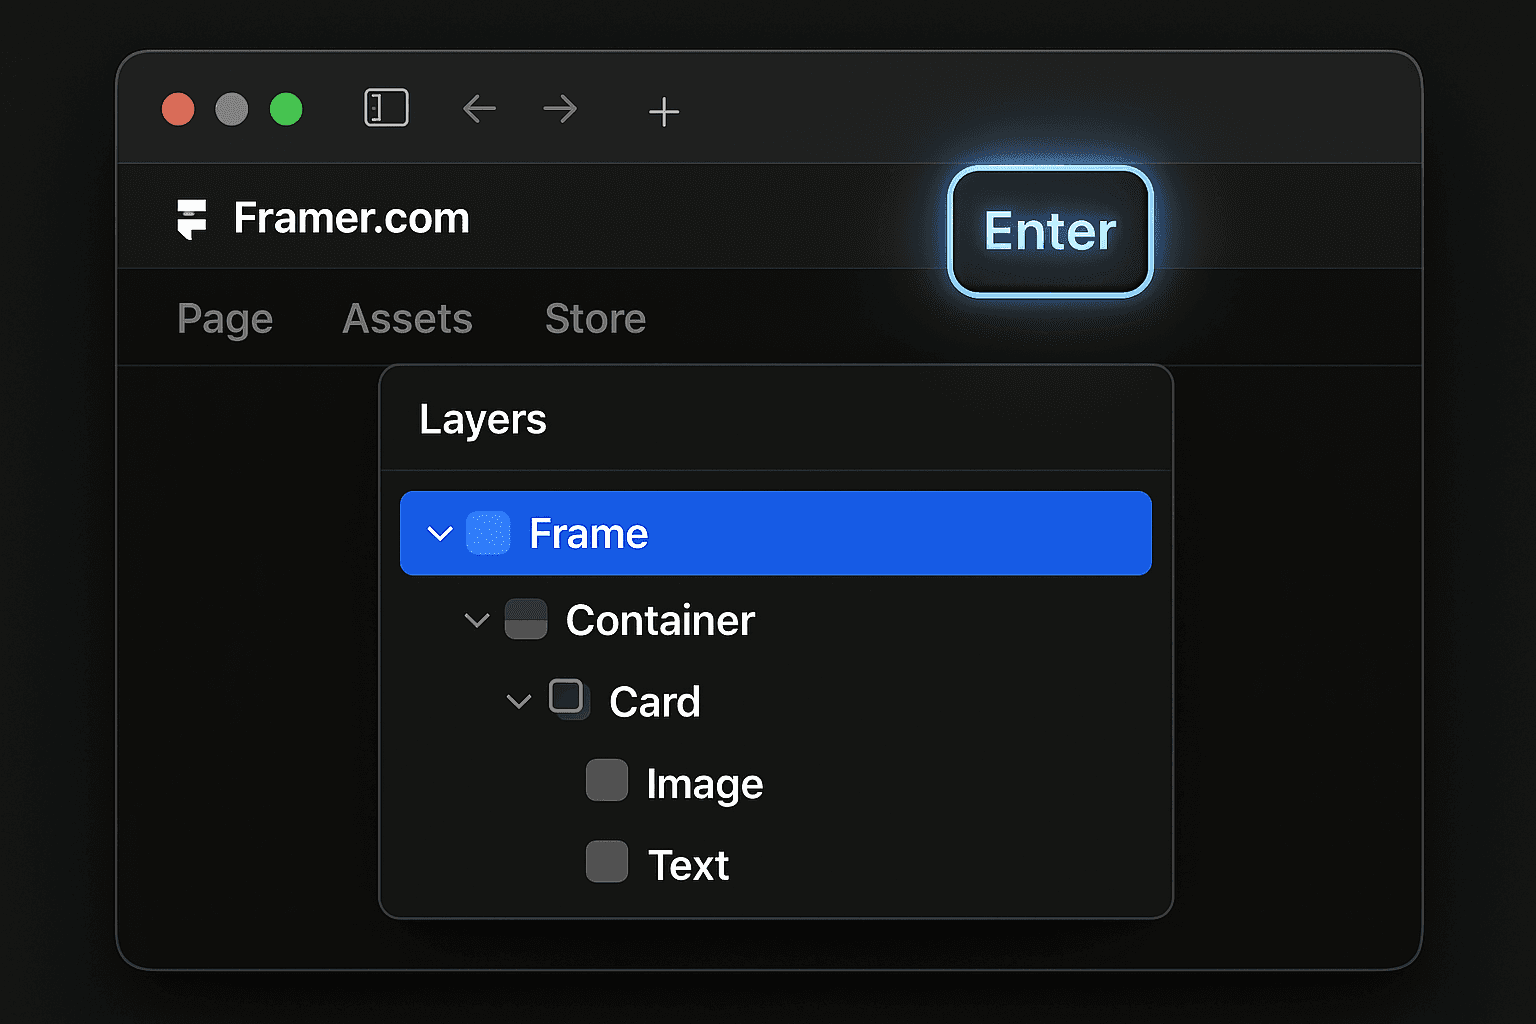
When you have a nested layer selected, press Enter to select its parent container. This makes navigating complex layer hierarchies much faster than hunting through the layers panel. Selects the parent container of your current selection.
Why it helps: When you’re working inside nested frames (a frame inside another frame), this shortcut helps you quickly move up one level in the hierarchy.
Example: If you have a button inside a card, and you currently have the button selected, pressing Enter selects the card instead.
11. Select Child Layer (Cmd/Ctrl + Enter)
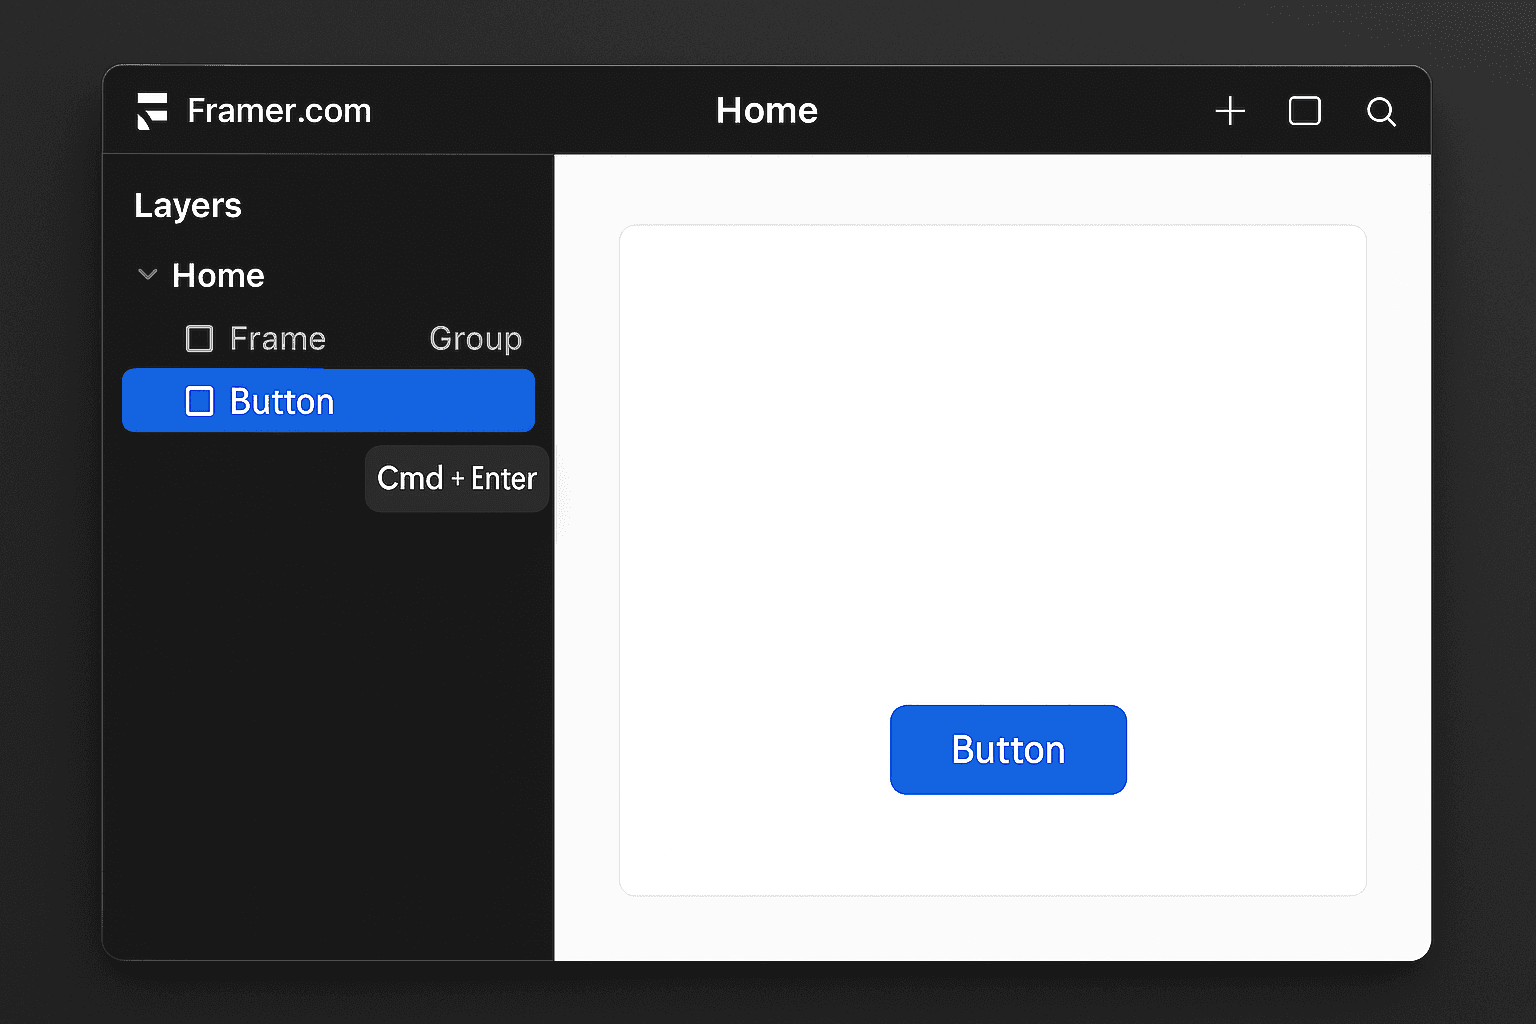
Going the opposite direction? Press Cmd + Enter (Mac) or Ctrl + Enter (Windows) to select the first child of your currently selected layer.
Use case: You’re editing a container and want to quickly jump to one of its inner elements, this shortcut saves you from manually clicking in the layers panel.
12. Use Components for Repeated Elements
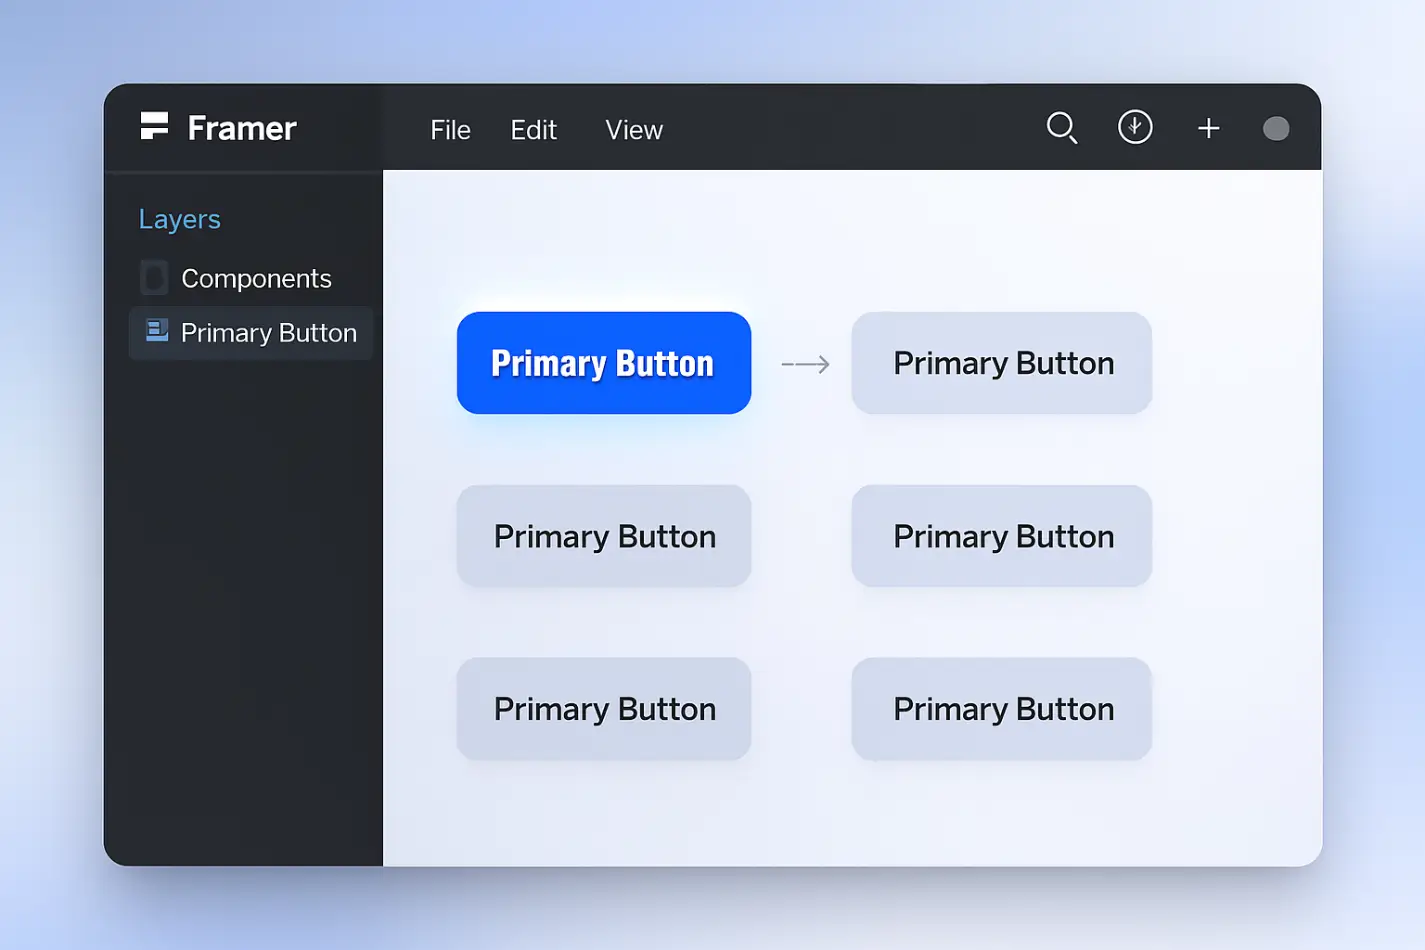
While not a keyboard shortcut, creating components is crucial for efficient Framer workflows. Select any element and press Cmd/Ctrl + K to create a component. This allows you to reuse design elements and make global updates instantly.
Turns any element or group into a Component, a reusable design block that can be used multiple times across your project.
Why components matter: If you change the main (master) component, all instances automatically update everywhere.
Example: Turn your main “Primary Button” into a component. If later you decide to update its corner radius or color, all buttons across your site update instantly.
Copy as Code (Right-Click Menu)

One of Framer's most powerful features is the ability to copy elements as React code. Right-click any element and select "Copy as Code" to get production-ready code snippets. This bridges the gap between design and development seamlessly.
How to use it:
Right-click any design element.
Choose “Copy as Code.”
Paste the code into your React project.
Why it’s powerful: Framer bridges the gap between design and development. Designers can hand off real, usable code to developers, not just images.
14. Quick Color Picker (I)

Press I to activate the color picker tool. Click anywhere on your canvas to sample colors from existing elements. This ensures color consistency across your design without manually entering hex codes.
How to use it:
Press I.
Move your cursor over any color on your canvas.
Click to select it, Framer will automatically apply that color to your active layer.
Why it’s great: Ensures color consistency across your project without manually typing hex codes.
15. Preview Mode (Cmd/Ctrl + P)
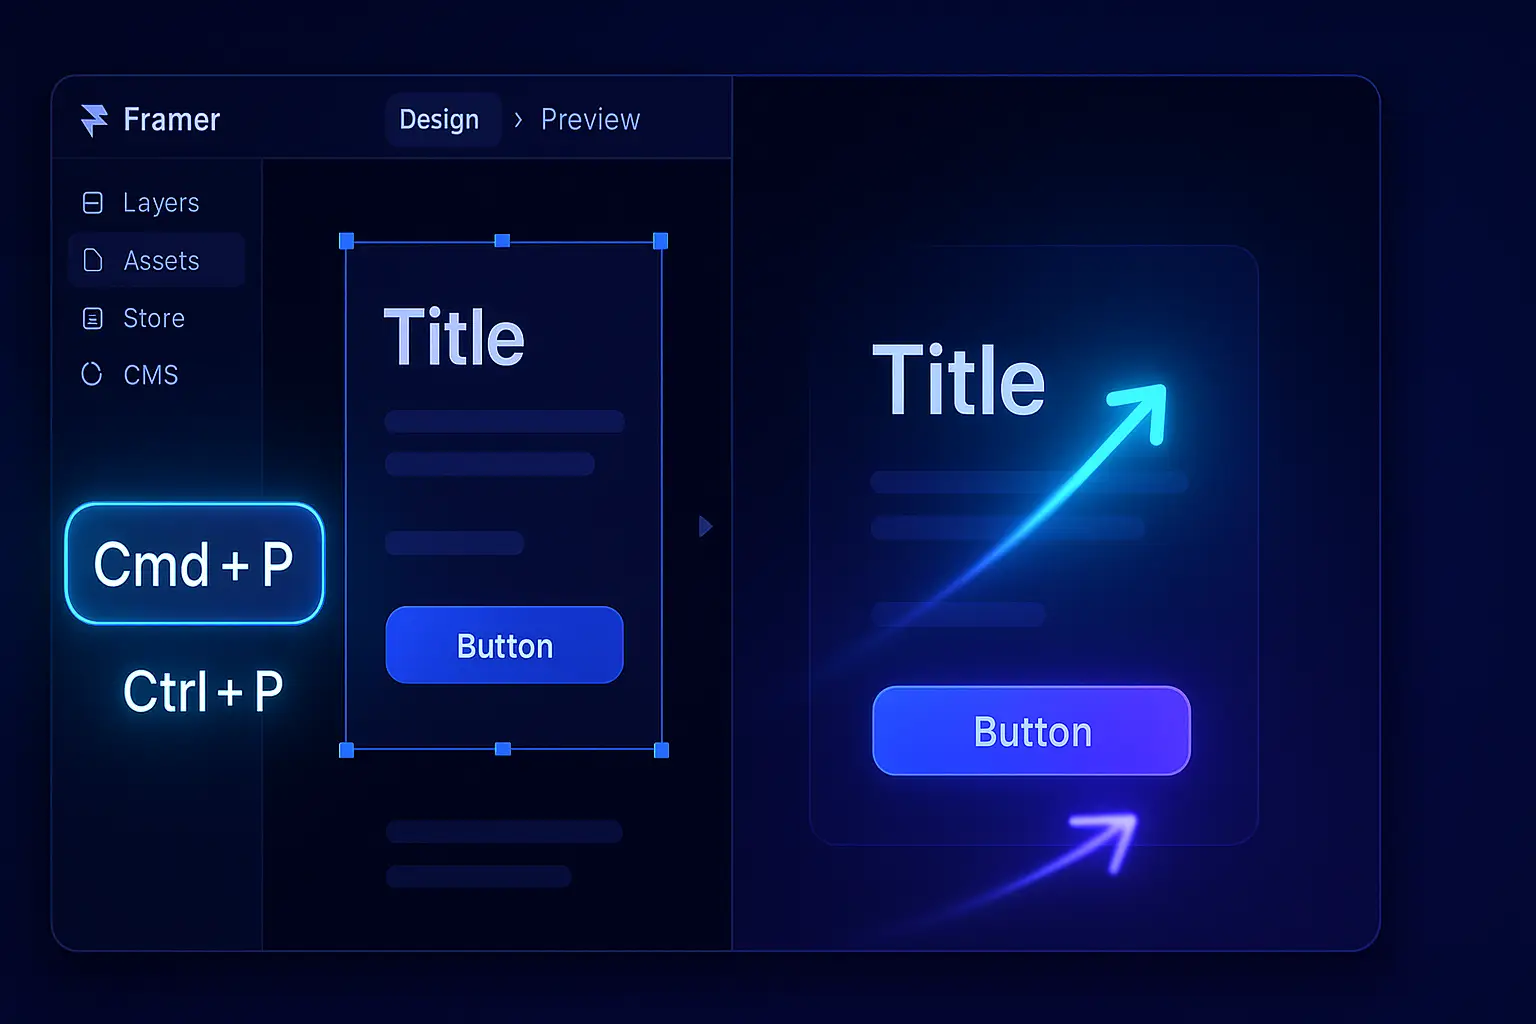
Press Cmd + P (Mac) or Ctrl + P (Windows) to instantly preview your interactive prototype. This lets you test interactions, animations, and responsive behavior without leaving your workspace.
Press Cmd/Ctrl + P.
Your prototype opens in Preview Mode.
Try clicking buttons, scrolling, or triggering animations.
Press Escape (Esc) to exit and return to editing.
Why it’s essential: You can experience your design as if it’s a real website or app, great for testing user flow and fixing problems early.
Bonus tip: Press Escape to exit preview mode and return to editing.
Maximizing Your Framer Workflow
Now that you know these important 15 Framer shortcuts and tips, here's how to make them stick:
Practice regularly: Dedicate a few minutes each day to consciously using shortcuts instead of menu commands. Within a week, they'll become second nature.
Customize your workflow: Framer allows you to customize keyboard shortcuts in preferences. Adjust them to match your habits from other design tools you use.
Combine shortcuts: The real power comes from chaining multiple shortcuts together. For example, duplicate an element (Cmd/Ctrl + D), group it (Cmd/Ctrl + G), then create a component (Cmd/Ctrl + K).
Conclusion
Mastering these 15 Framer shortcuts and tips will dramatically improve your design efficiency and help you create stunning interactive prototypes faster than ever. Remember, the key to becoming proficient is consistent practice. Start by incorporating two or three shortcuts into your daily workflow, then gradually add more as they become habitual.
Ready to take your Framer skills to the next level? Bookmark this guide and keep it handy as you work. Your future self will thank you for the time saved and the smoother, more enjoyable design experience.
What's your favorite Framer shortcut? Share your productivity tips in the comments below!
Frequently Asked Questions
1: Can I customize Framer keyboard shortcuts?
Yes, go to Framer's preferences menu to customize keyboard shortcuts according to your preferences.
2: Do these shortcuts work on both Mac and Windows?
Most shortcuts work on both platforms. Generally, replace Cmd with Ctrl when using Windows.
3: Where can I find a complete list of Framer shortcuts?
Press Cmd + / (Mac) or Ctrl + / (Windows) within Framer to view the complete keyboard shortcuts panel.
4: Will learning these shortcuts work with the web version of Framer?
Yes, all these shortcuts work in both the desktop app and web version of Framer.
Are you spending too much time clicking through menus in Framer? Whether you're a seasoned designer or just getting started with Framer, mastering keyboard shortcuts and productivity tips can dramatically speed up your workflow. In this comprehensive guide, we'll explore 15 game-changing Framer shortcuts and tips that will help you design more efficiently and unlock the full potential of this powerful design tool.
Why Framer Shortcuts Matter
Before diving into the shortcuts, let's understand why they're crucial for your design productivity. Professional designers can save hours each week by incorporating keyboard shortcuts into their workflow. When you're designing interactive prototypes and websites in Framer, every second counts. These shortcuts will help you maintain your creative flow without constantly switching between your keyboard and mouse.
Essential Framer Keyboard Shortcuts
1. Quick Frame Creation (F)
Generates a frame immediately - a frame is a kind of container or shape to insert things like texts, images and so forth.
How to use:
Press F on your keyboard.
Drag and click on your canvas to establish the frame dimensions.
Or tap once to create a frame with the default size.
Pro Tip:
Shift-drag to draw a frame in the shape of a perfect square.
2. Text Tool Shortcut (T)
Need to add text quickly? Press T to activate the text tool. You may style your text font, size, color from the properties panel.
How to use it:
Click T to change back on the text plot.
Click anywhere on the canvas to paste in your text.
Begin typing Framer will automatically make a text box for you.
Why it’s useful: Instead of manually adding text layers from the toolbar, you can just press T, click, and start typing- it saves time and keeps your design flow going.
Example: You’re building a landing page. You press T, click once, and type “Welcome to Our Product” Then, press T again to add a subheading like “Built for speed and creativity.”
3. Duplicate with Precision (Cmd/Ctrl + D)
Shortcut:
Mac: Cmd + D
Windows: Ctrl + D
This does duplicate the currently selected element making an exact copy of it.
How to use it:
Select any layer like a button or text block.
Press Cmd + D (Mac) or Ctrl + D (Windows).
A duplicate will appear right next to your original.
If you move the new copy slightly, Framer remembers that distance.
The next time you press Cmd/Ctrl + D, it will repeat that exact spacing automatically.
Why it’s awesome: It lets you create evenly spaced elements like cards, buttons, or icons super fast.
Pro Tip: After duplicating once, press arrow keys to fine-tune spacing for pixel-perfect layouts.
4. Group Elements Instantly (Cmd/Ctrl + G)
Groups combined layers, meaning you could drag, resize or otherwise manipulate them as a single entity.
How to use this shortcut:
Choose more than one layer (holding Shift and clicking each one).
Hit Cmd/Ctrl + G to group them together.
You should now have one “group” in the Layers panel.
Cmd/Ctrl + G will group them and to ungroup, it is Cmd/Ctrl Shift +G.
Why it’s important: It helps you to have a clean layers panel and makes editing complex designs less painful.
Pro Tip: Clear naming of your groups (“Navbar” or “Hero Section”) keeps your project organized.
Example: You might combine a logo, navigation links and button all together in one "Header Group" so then you can move the entire header as a single block.
5. Toggle Visibility (Cmd/Ctrl + Shift + H)
Hide selected layers with Cmd + Shift + H (Mac) or Ctrl + Shift + H (Windows). This is incredibly useful when working with complex designs where you need to temporarily hide elements without deleting them.
Why it’s useful: When you’re working on crowded layouts, hiding certain elements helps you focus on specific areas without clutter.
Example: If you’re designing a popup and it covers your background content, hide the popup with this shortcut while you adjust the layout behind it.
6. Zoom to Fit (Cmd/Ctrl+0)
Press Cmd + 0 (Mac) or Ctrl + 0 (Windows) to fit your entire canvas in the view port. This is perfect for getting an overview of your design or when you need to quickly navigate to different art boards.
When to use it: If you’ve zoomed in too far or lost track of where you are, press this to instantly see everything.
Example: After working closely on a button, press Cmd/Ctrl + 0 to see your entire website layout again.
7. Zoom to Selection (Cmd/Ctrl + 2)
Focus on specific elements by selecting them and pressing Cmd + 2 (Mac) or Ctrl + 2 (Windows). Framer will automatically zoom and center your selected layers, making detailed editing much easier.
How to use it:
Click any object on the canvas.
Press the shortcut.
Framer zooms in and focuses on that element instantly.
Why it helps: It’s perfect for big projects, no more hunting around the canvas to find your selection.
8. Hand Tool for Panning (Space + Drag)
Hold Space and drag to pan around your canvas. This is much faster than using scrollbars and keeps your hand on the keyboard for a smoother workflow.
Example: When you’re zoomed in close on a section of your design and want to look at another part, just hold space and drag, like moving a big sheet of paper around.
Pro Tip: This is smoother and faster than using the scrollbars.
9. Lock Layers (Cmd/Ctrl+L)
Prevent accidental edits by locking layers with Cmd + L (Mac) or Ctrl + L (Windows). This is especially useful when working with background elements or completed sections of your design. Locks the selected layer so you can’t accidentally move or edit it.
Why it’s useful: It’s great for protecting background layers or completed sections from accidental changes.
Example: Once your background image is perfectly aligned, lock it so it doesn’t move while you edit text above it.
10. Select Parent Layer (Enter)
When you have a nested layer selected, press Enter to select its parent container. This makes navigating complex layer hierarchies much faster than hunting through the layers panel. Selects the parent container of your current selection.
Why it helps: When you’re working inside nested frames (a frame inside another frame), this shortcut helps you quickly move up one level in the hierarchy.
Example: If you have a button inside a card, and you currently have the button selected, pressing Enter selects the card instead.
11. Select Child Layer (Cmd/Ctrl + Enter)
Going the opposite direction? Press Cmd + Enter (Mac) or Ctrl + Enter (Windows) to select the first child of your currently selected layer.
Use case: You’re editing a container and want to quickly jump to one of its inner elements, this shortcut saves you from manually clicking in the layers panel.
12. Use Components for Repeated Elements
While not a keyboard shortcut, creating components is crucial for efficient Framer workflows. Select any element and press Cmd/Ctrl + K to create a component. This allows you to reuse design elements and make global updates instantly.
Turns any element or group into a Component, a reusable design block that can be used multiple times across your project.
Why components matter: If you change the main (master) component, all instances automatically update everywhere.
Example: Turn your main “Primary Button” into a component. If later you decide to update its corner radius or color, all buttons across your site update instantly.
Copy as Code (Right-Click Menu)
One of Framer's most powerful features is the ability to copy elements as React code. Right-click any element and select "Copy as Code" to get production-ready code snippets. This bridges the gap between design and development seamlessly.
How to use it:
Right-click any design element.
Choose “Copy as Code.”
Paste the code into your React project.
Why it’s powerful: Framer bridges the gap between design and development. Designers can hand off real, usable code to developers, not just images.
14. Quick Color Picker (I)
Press I to activate the color picker tool. Click anywhere on your canvas to sample colors from existing elements. This ensures color consistency across your design without manually entering hex codes.
How to use it:
Press I.
Move your cursor over any color on your canvas.
Click to select it, Framer will automatically apply that color to your active layer.
Why it’s great: Ensures color consistency across your project without manually typing hex codes.
15. Preview Mode (Cmd/Ctrl + P)
Press Cmd + P (Mac) or Ctrl + P (Windows) to instantly preview your interactive prototype. This lets you test interactions, animations, and responsive behavior without leaving your workspace.
Press Cmd/Ctrl + P.
Your prototype opens in Preview Mode.
Try clicking buttons, scrolling, or triggering animations.
Press Escape (Esc) to exit and return to editing.
Why it’s essential: You can experience your design as if it’s a real website or app, great for testing user flow and fixing problems early.
Bonus tip: Press Escape to exit preview mode and return to editing.
Maximizing Your Framer Workflow
Now that you know these important 15 Framer shortcuts and tips, here's how to make them stick:
Practice regularly: Dedicate a few minutes each day to consciously using shortcuts instead of menu commands. Within a week, they'll become second nature.
Customize your workflow: Framer allows you to customize keyboard shortcuts in preferences. Adjust them to match your habits from other design tools you use.
Combine shortcuts: The real power comes from chaining multiple shortcuts together. For example, duplicate an element (Cmd/Ctrl + D), group it (Cmd/Ctrl + G), then create a component (Cmd/Ctrl + K).
Conclusion
Mastering these 15 Framer shortcuts and tips will dramatically improve your design efficiency and help you create stunning interactive prototypes faster than ever. Remember, the key to becoming proficient is consistent practice. Start by incorporating two or three shortcuts into your daily workflow, then gradually add more as they become habitual.
Ready to take your Framer skills to the next level? Bookmark this guide and keep it handy as you work. Your future self will thank you for the time saved and the smoother, more enjoyable design experience.
What's your favorite Framer shortcut? Share your productivity tips in the comments below!
Frequently Asked Questions
1: Can I customize Framer keyboard shortcuts?
Yes, go to Framer's preferences menu to customize keyboard shortcuts according to your preferences.
2: Do these shortcuts work on both Mac and Windows?
Most shortcuts work on both platforms. Generally, replace Cmd with Ctrl when using Windows.
3: Where can I find a complete list of Framer shortcuts?
Press Cmd + / (Mac) or Ctrl + / (Windows) within Framer to view the complete keyboard shortcuts panel.
4: Will learning these shortcuts work with the web version of Framer?
Yes, all these shortcuts work in both the desktop app and web version of Framer.


Read more articles

Feb 28, 2026
Best Framer Templates with Parallax Scrolling
Feb 28, 2026
Best Framer Templates with Parallax Scrolling

Feb 22, 2026
Framer Canvas: Design Without Limits
Feb 22, 2026
Framer Canvas: Design Without Limits

Feb 19, 2026
Best Companies Specializing in Framer Website Templates in 2026
Feb 19, 2026
Best Companies Specializing in Framer Website Templates in 2026
Find perfect template for your website & get 50% discount coupon

Templates
Copyright © 2026 FramerBite, A Part of Creetfy LLC. All Rights Reserved
Follow us on Twitter
Find perfect template for your website & get 50% discount coupon
Templates
Copyright © 2026 FramerBite, A Part of Creetfy LLC. All Rights Reserved
Follow us on Twitter
Find perfect template for your website & get 50% discount coupon
Templates
Copyright © 2026 FramerBite, A Part of Creetfy LLC. All Rights Reserved
Follow us on Twitter
Find perfect template for your website & get 50% discount coupon
Templates
Copyright © 2026 FramerBite, A Part of Creetfy LLC. All Rights Reserved
Follow us on Twitter