7 Hidden Framer Features Every Designer Should Know About
Last Updated on:
Author:
Framerbite
Framerbite

Framer is great for designers who want to create websites without code and gives design freedom too. Although it’s known for its drag-and-drop interface and AI-driven features, Framer has a few hidden tricks that you can use to work smarter and more creatively.
Whether you are a freelancer, a work-from-home web designer or an agency that needs to impress clients, an entrepreneur who is testing your own product concept on potential users or a member of design team at the upstart. We have 7 hidden Framer features most designers never seem to know about but that they really should. Each piece offers real-world samples, application-by-application instructions and tactical methods to take back and use at your job every day.
Why Hidden Framer Features Matter?
Before we start to break down the concrete features, it's key to understand why hunting for and mastering hidden functionality is so important for designers come 2026.
Client Expectations Are Higher: Clients now want more than static designs. They want interactive, immersive experiences that are competitive with the most dominant tech companies.
Competition Is Tougher: As design tools are getting more easily accessible, the standard for professional level work is pushed up. Hidden features help you create work that stands out.
Efficiency Is Everything: In an industry that moves quickly, the designers who can work cleverer not harder are the ones who succeed.
Advantage of these Hidden Framer Features
When you master features that most designers don't know about, you gain:
Unique Capabilities that differentiate your work.
Increased Efficiency in your design workflow.
Professional Credibility with advanced techniques.
Higher Project Value through enhanced functionality.
Now, let's explore the features that will give you this modern age.
Feature 1: Advanced Easing Controls

Most designers use Framer's default animation presets, but where the magic really starts flying is working with your own easing controls. This secret feature is responsible for creating animations of such high quality that most people will mistake them for expensive ones on apps and websites.
What Are Advanced Easing Controls?
The ease of the animations relates to how quickly and slowly the animation moves. With other common easing options missing, you can also use “ease-in” and “ease-out”. Creatures of custom, design your own curve with Framer’s easing controls for a touch of personality and pro polish.
How to Access Advanced Easing
Select any animated element in your Framer project
Open the Animation panel on the right sidebar
Click on the easing dropdown
Look for "Custom" option at the bottom of the list
Click "Custom" to reveal the cubic-bezier curve editor
Practical Applications
Micro-Interactions: Create button hover effects that feel more responsive and engaging than standard easing options.
Page Transitions: Design smooth page changes that feel natural and fluid, improving user experience significantly.
Loading Animations: Build loading indicators that feel purposeful rather than generic, keeping users engaged during wait times.
Pro Tips for Advanced Easing
Study Real-World Motion: Observe how objects move in the physical world and replicate that timing.
Test on Different Devices: Custom easing can perform differently on various devices and browsers.
Save Your Favorites: Create a library of custom easing curves for consistent use across projects.
Start Subtle: Begin with small modifications to standard easing before creating dramatic custom curves.
Real-World Impact
Designers who master advanced easing report 30-40% higher client satisfaction with animation work and faster approval times because animations feel more professional and intentional.
Feature 2: Smart Component Variants
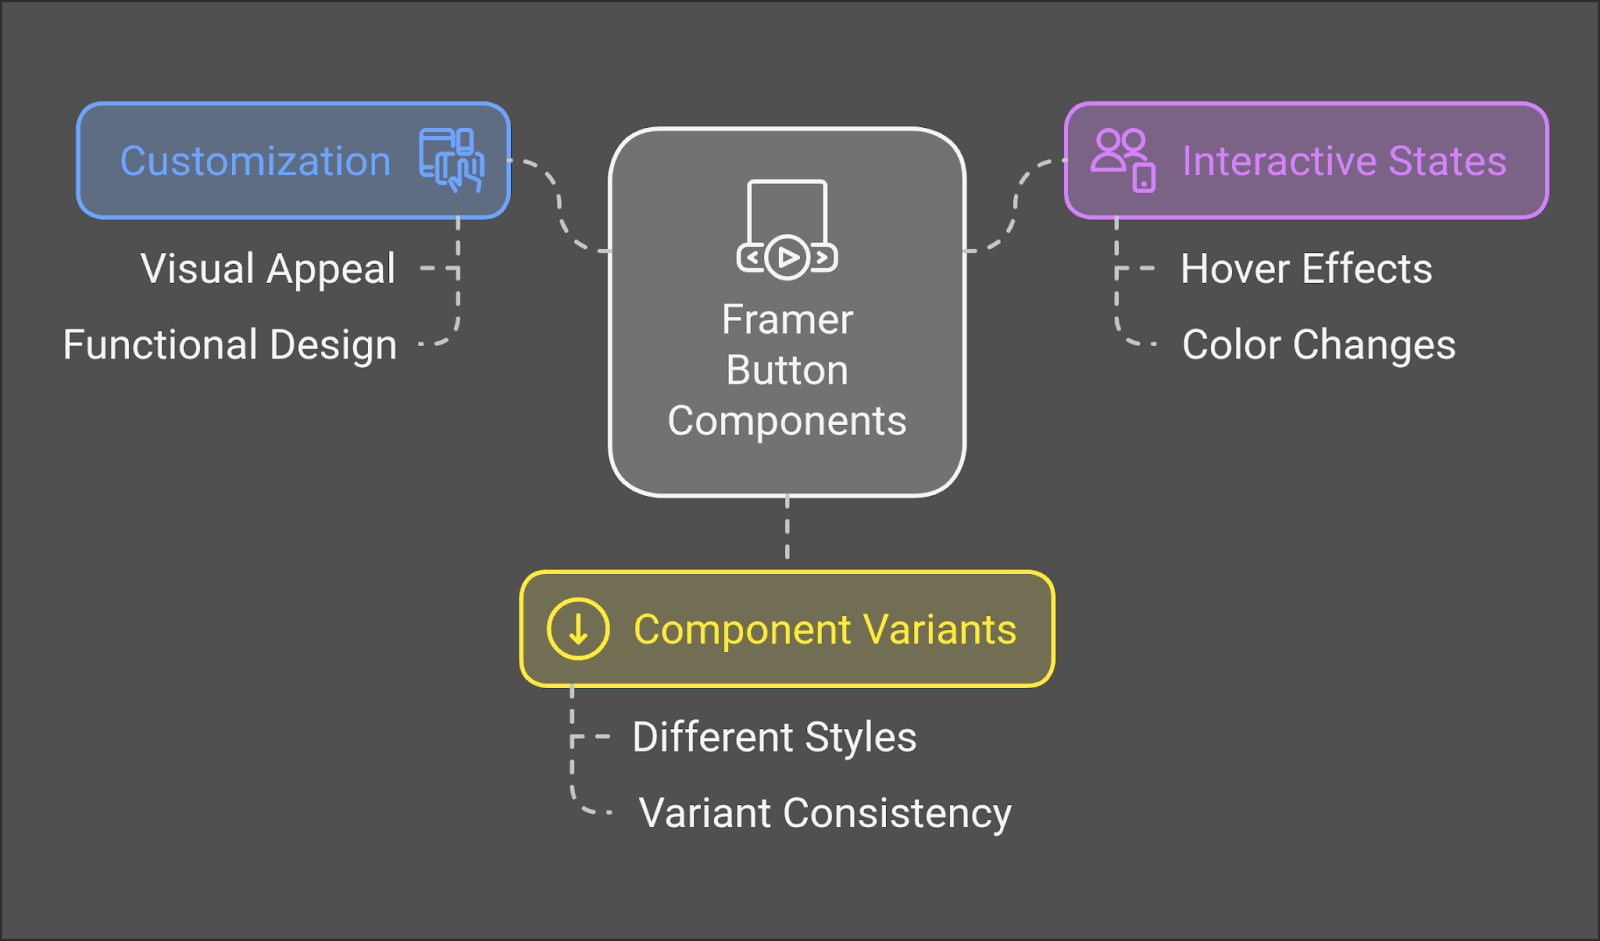
Though most designers are experienced with basic building blocks, Framer’s smart component variants are one of the powerhouse yet under-used features in Framer. This feature enables powerful, dynamic components that adjust smartly to their setting.
What is Smart Component Variants?
Smart Component Variants go beyond simple component instances. They allow you to create one master component with multiple states, sizes, and configurations that can automatically switch between variants based on user interaction or data.
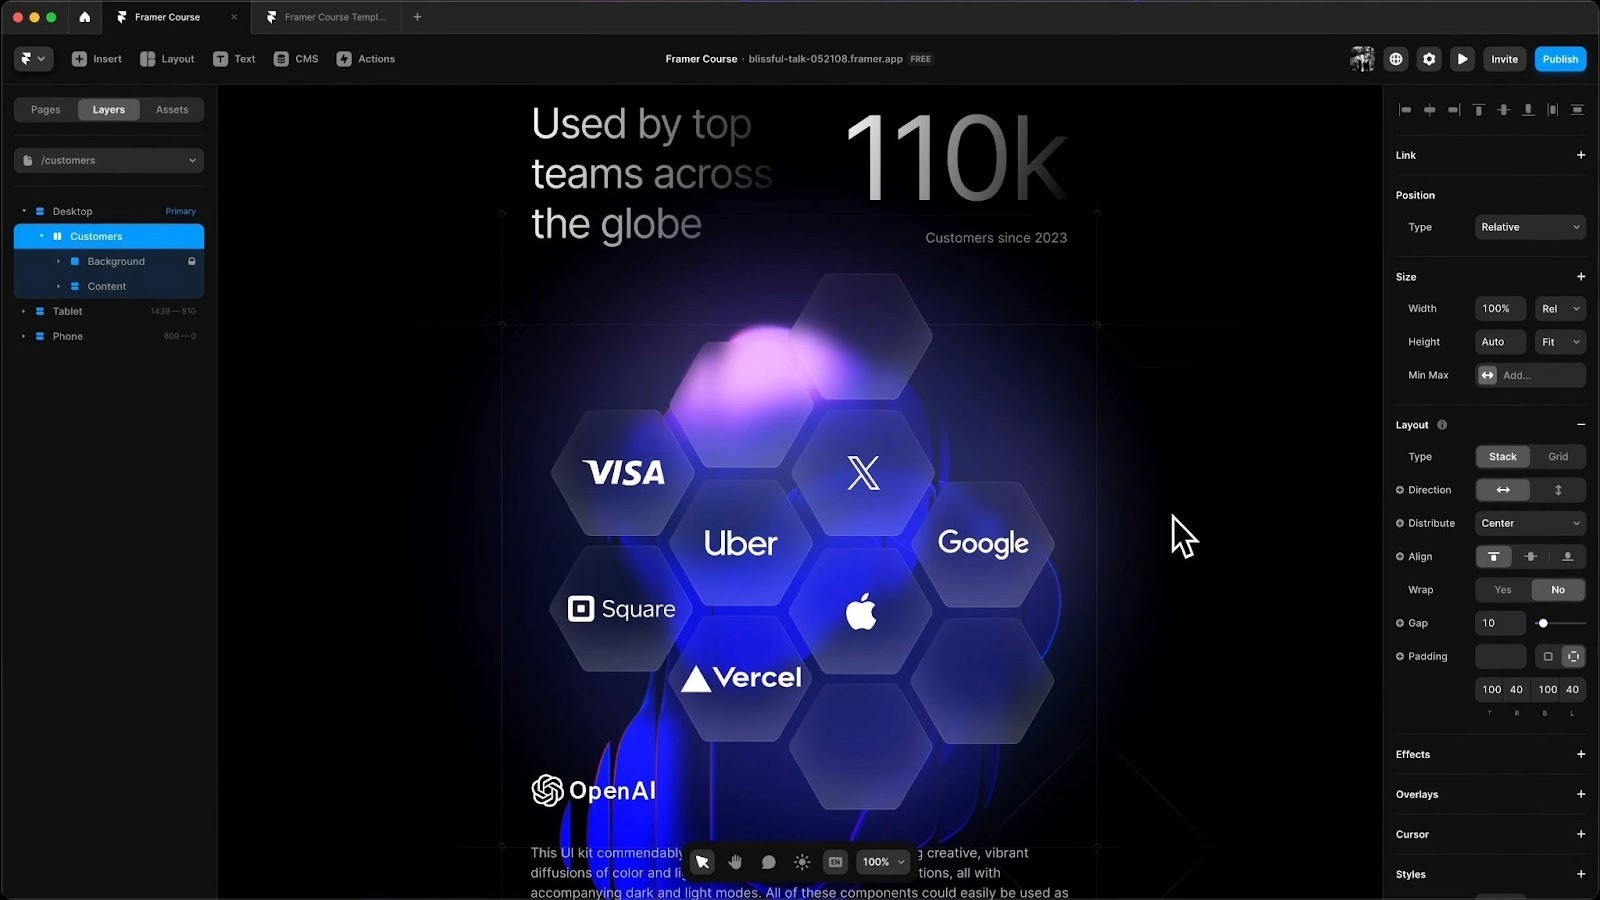
How to Create Smart Component Variants?
Create your base component- button, card, or navigation element
Right-click the component and select "Create Component Variant"
Modify the variant - change colors, text, size, or layout
Repeat for additional variants - hover states, active states, different sizes
Set up variant properties in the component panel - state, size, type
Configure automatic switching between variants using interaction triggers
Advanced Variant Techniques
Variants within variants: Create components where several properties may be mixed and matched.
Variant Based on Data Driven: Automatically choose which variant to show based on external data.
Responsive Variants: Be able to restructure components rather than just changing in size for different screen sizes.
Interactive Variants: Construct components with 1 to many states that change in response to user interaction.
Practical Use Cases
Navigation Systems: Create navigation bars that automatically adapt to different page contexts and user states
Product Cards: Design e-commerce cards that show different information based on product type, availability, or user preferences
Form Elements: Build form components that provide real-time feedback and validation states
Dashboard Widgets: Create data visualization components that adapt their display based on the type and amount of data
Component Variant Best Practices
Plan Your Variants: Before building, map out all the states and configurations you'll need
Use Consistent Naming: Develop a naming convention for variant properties that scales across your design system
Test All Combinations: Ensure every possible combination of variant properties works correctly
Document Your System: Create guidelines for how team members should use your component variants
Feature 3: Code Overrides – Bridging Design and Development
One of Framer's most powerful features is Code Overrides. It’s a functionality that allows designers to add custom behavior and advanced interactivity without leaving the Framer environment.
What Are Code Overrides?
Code Overrides are little JavaScript functions you can apply to any layer or component in Framer. This allows you to do even more than point and click. Consider them superpowers for your design elements.
How to Accessing Code Overrides?
Select any layer or component in your design
Look for the "Code" section in the right properties panel
Add a New Override to build a custom function
Write your JavaScript within the newly opened code editor
Apply it and instantly see your override in action
Beginner-Friendly Override Examples
Dynamic Text: Dynamically update reusable components on the fly based on runtime data or user interaction
Count down or user interactions: Create anything that counts: users, space characters, animations
Validation: Real time form validation is more than just basic HTML required
Data Integrations: Import live data from APIs to give your prototypes a sense of reality and action
Advanced Override Applications
Complex animations: make animations based on the scroll position, mouse movement or device orientation
State Management: Create components that can remember user preferences and adjust accordingly
Integrations: Integrate with third-party services such as payment providers, analytics engines, or social APIs
Custom Physics: Create your own interactive physics, drag and drop interaction, collision detection or particle effects
Why Code Overrides Matter?
Prototype Fidelity: Create prototypes that behave almost identically to final products
Client Presentations: Demonstrate complex functionality without building a full application
Design Validation: Test interaction concepts before involving developers
Personal Growth: Bridge the gap between design and development skills
Code Overrides Tips
Start Small: Begin with simple text or style modifications
Use Documentation: Framer provides extensive documentation and examples
Join Communities: Connect with other designers using code overrides
Practice Regularly: Spend at least 1 hour a week playing with new override ideas
Feature 4: Layout Grids and Constraints

Basic responsive design is something most designers have heard of, but Framer's advanced layout grid and constraint systems take control over how your designs behave on a device -and screen size- to another level.
Beyond Basic Responsive Design
Traditional responsive design may use very basic breakpoints and some simple scaling. Framer's sophisticated layout system enables you to redefine your designs as truly adaptive layouts, remixing, prioritizing and demoting content based on available space and device capability.
Advanced Grid Systems
CSS Grid Integration: Framer’s grid system is powered by CSS Grid, providing you with advanced layouts options such as grid template areas, fractional units and automatic content placement.
Fluid Grids: Design grids that can be rearranged based on the number of columns, row heights, and spacing in each grid to match content amount as well as screen size.
Nested Grids: Use nested grids to build complex layouts while maintaining complete control over the responsiveness of each grid system independently.
Mastering Constraints
Relative Constraint: Positioning of objects relative to more than one reference.
Content-aware sizing: Create objects that resize automatically with the content try to keep design integrity.
Proportional Relationships: Create relationships between parts that retain visual hierarchy at all screen sizes.
Advanced Layout Techniques
Layout concept Priority-based hiding: Decide for which elements you want to hide or show based on available space and try that you keep your most important content always visible.
Reflowing Content: Develop layouts that automatically flows and re-positions content to pack the most available space.Organize your layout based on time-series data.
Contextual Styling: Elements that change the way they look depending on where they are in a layout grid.
Practical Implementation
Real World Dashboard Layouts: Construct admin panels and dashboards that look good, work well on all handheld devices, display beautifully at various screen sizes and data densities.
E-commerce Grids: Building product grids that will automatically convert better on any device.
Content Layouts: Build gorgeous blog and content layouts to best support your stories, regardless of display size.
Navigation Systems: Build navigation that intelligently adapts its layout and functionality based on available space.
Layout Best Practices
Content-First Approach: Design your layout system around your actual content, not arbitrary breakpoints.
Test Real Data: Use actual content and data when testing your layout systems.
Performance Considerations: Ensure your advanced layouts don't negatively impact loading times.
Accessibility Focus: Make sure your responsive layouts maintain accessibility standards across all device.
Feature 5: Team Collaboration Features
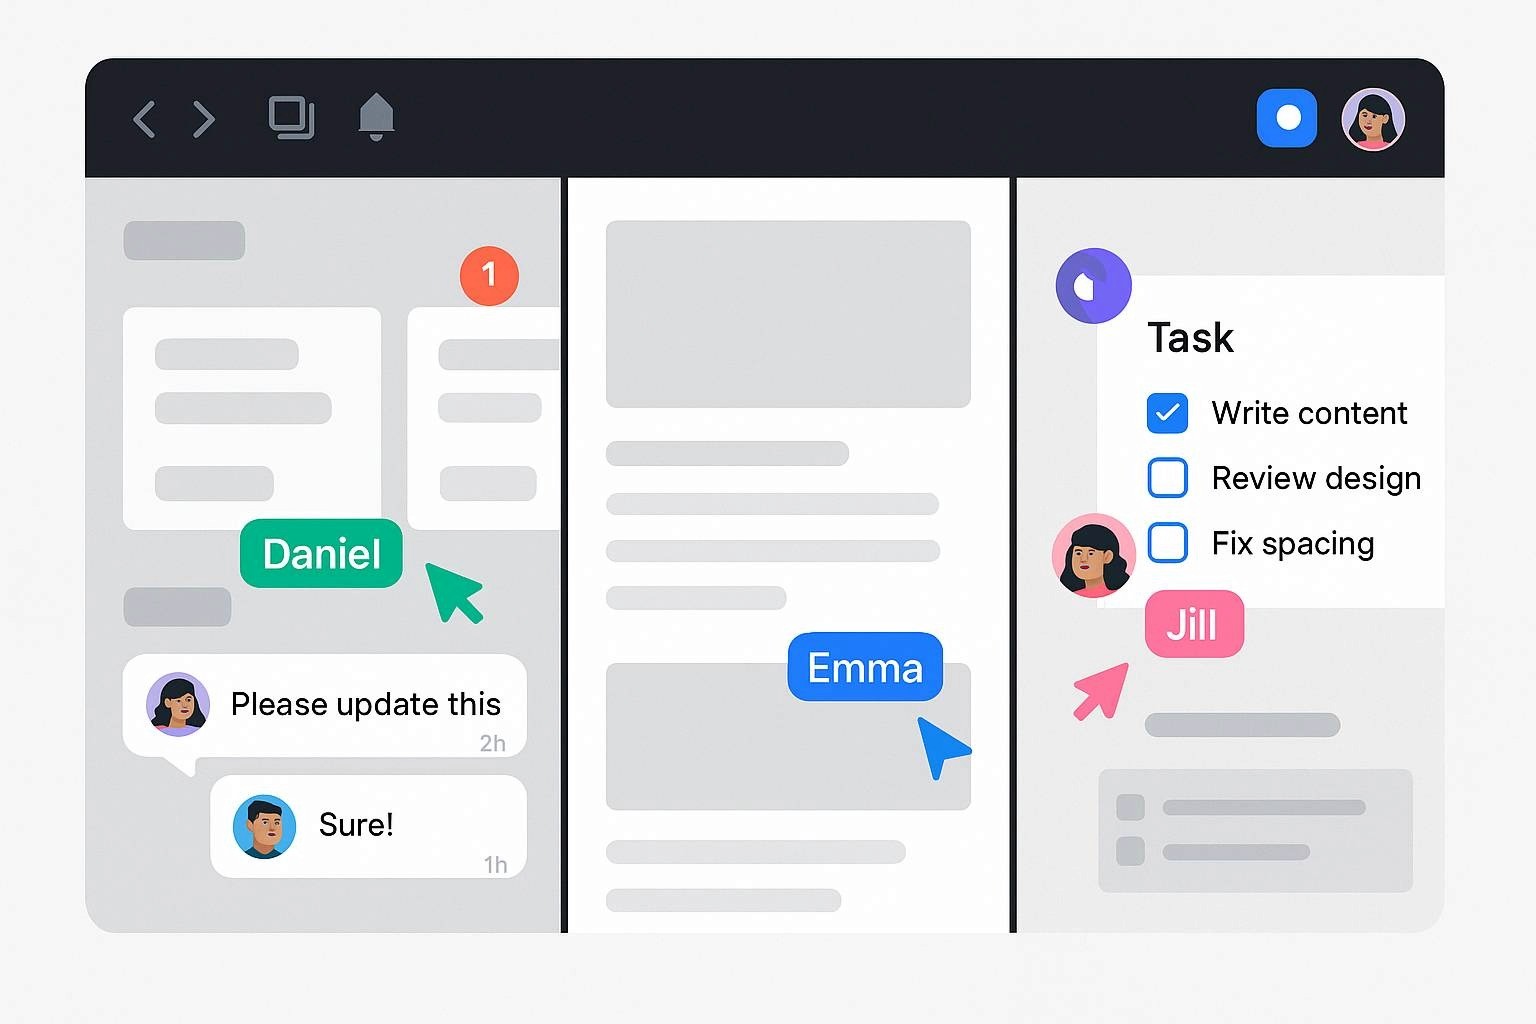
Most designers think of Framer as a solo design tool, but its advanced collaboration features can transform how design teams work together, dramatically improving productivity and design quality.
Version Control and Branching
Design Branching: Similar to Git for developers, Framer allows you to create branches of your design for experimental features or alternative approaches.
Merge Capabilities: Safely merge different design branches while preserving the integrity of your main design files.
Version History: Access detailed version history with the ability to restore any previous state of your design.
Change Tracking: See exactly what changed between versions, who made the changes, and when.
Advanced Commenting and Review Systems
Contextual Comments: Leave comments attached to specific elements, states, or interactions rather than just general feedback.
Comment Threading: Engage in detailed discussions about specific design decisions directly within the design file.
Task Assignment: Convert comments into actionable tasks with due dates and assignees.
Review Workflows: Set up formal review processes with approval gates and stakeholder sign-offs.
Real-Time Collaboration Features
Live Cursors: See where other team members are working in real-time, avoiding conflicts and enabling seamless collaboration.
Simultaneous Editing: Multiple team members can work on different parts of the same design simultaneously.
Component Library Syncing: Maintain consistency across team members with automatically synced component libraries and design systems.
Cross-Project Sharing: Share components, styles, and interactions across multiple projects and team members.
Team Management Tools
Role-Based Permissions: Control who can edit, comment, or view different parts of your design projects.
Client Access Controls: Provide clients and stakeholders with appropriate access levels without compromising your work.
Activity Feeds: Stay updated on all team activity with comprehensive activity feeds and notifications.
Integration Capabilities: Connect Framer with project management tools, communication platforms, and development workflows.
Collaboration Best Practices
Establish Workflows: Define clear processes for how your team will use collaboration features.
Communication Standards: Set up guidelines for effective commenting and feedback within Framer.
File Organization: Create consistent naming and organization systems that work for all team members.
Regular Reviews: Schedule regular team reviews using Framer's collaboration tools to maintain design quality and alignment.
Feature 6: Performance Optimization Tools
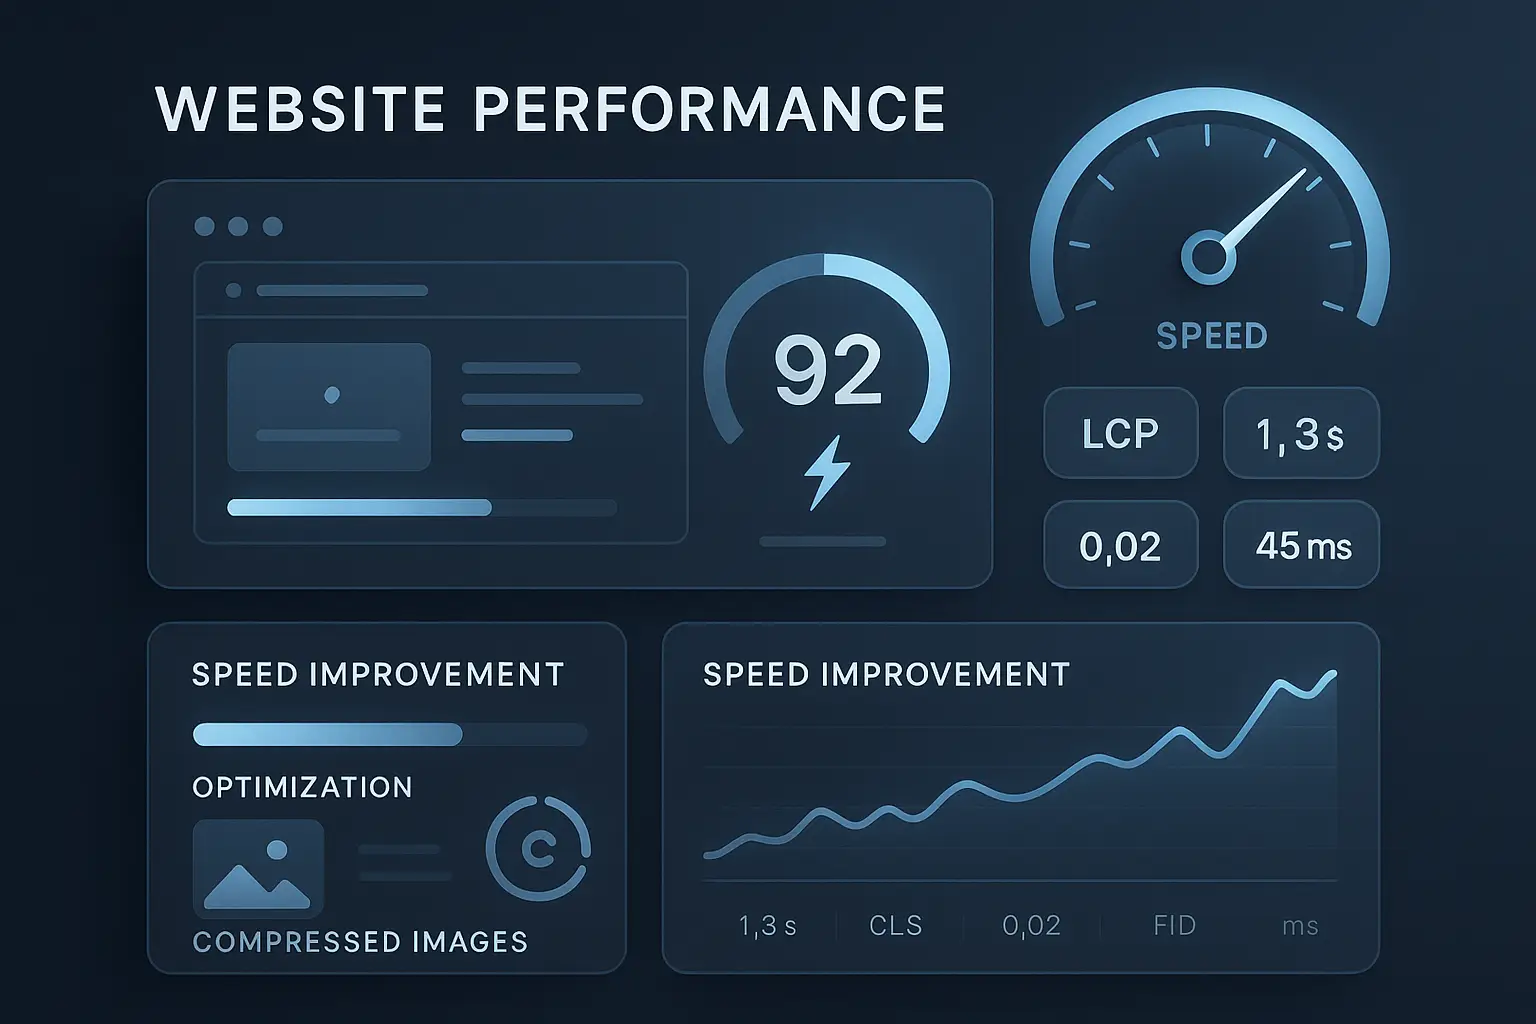
Hidden within Framer's interface are powerful performance optimization tools that can dramatically improve your website's loading speed and user experience – crucial factors for both user satisfaction and SEO ranking. If your confused about Framer SEO, read here for more details: Framer SEO 101: Tools, Settings & Tips.
Asset Optimization Features
Automatic Image Compression: Framer automatically optimizes images for web delivery, but you can access advanced controls for fine-tuning.
Format Selection: Choose optimal image formats (WebP, AVIF) based on browser support and quality requirements.
Lazy Loading Controls: Configure which images and elements load immediately versus on-demand as users scroll.
Progressive Loading: Set up progressive image loading for better perceived performance.
Code Optimization
Unused CSS Detection: Identify and remove unused CSS styles that bloat your website's loading time.
JavaScript Bundling: Control how your custom code and overrides are bundled and delivered to browsers.
Critical Path Optimization: Prioritize the loading of above-the-fold content for faster perceived performance.
Caching Strategies: Configure browser caching for static assets to improve return visitor performance.
Advanced Performance Features
Preloading Controls: Specify which resources should be preloaded based on user behavior patterns.
Resource Prioritization: Set loading priorities for different types of content based on their importance to user experience.
Performance Budgets: Set performance targets and get warnings when your designs exceed them.
Real-Time Performance Monitoring: Monitor your site's performance metrics directly within Framer.
Mobile Performance Optimization
Touch Target Sizing: Ensure all interactive elements meet mobile usability guidelines.
Gesture Optimization: Optimize gestures and interactions for mobile devices.
Battery Usage Considerations: Design animations and interactions that don't drain device batteries.
Network Adaptation: Configure how your site adapts to different network conditions.
Performance Measurement Tools
Built-in Analytics: Access performance metrics directly within Framer without external tools.
Core Web Vitals Tracking: Monitor Google's Core Web Vitals metrics that impact SEO rankings.
User Experience Metrics: Track real user experience data to identify performance bottlenecks.
Comparative Analysis: Compare your site's performance against industry benchmarks and competitors.
Optimization Best Practices
Performance-First Design: Consider performance implications during the design phase, not just at the end.
Regular Audits: Conduct regular performance audits to catch issues before they impact users.
Mobile Priority: Always prioritize mobile performance given the majority of web traffic.
Continuous Monitoring: Set up ongoing performance monitoring to catch regressions quickly.
Feature 7: API Integration and Dynamic Content

It is the most powerful "secret" in Framer to work with live data and API integrations. That makes static designs feel like living apps powered by actual content.
Dynamic content enables your Framer projects to show actual, live data from outside the workspace. This makes your prototypes and websites real or new looking instead of templates.
API Integration Capabilities
Support for REST API: Integrate with any REST API to fetch and display live data in your designs.
Integrate with GraphQL: Access your data for more optimized pulling and manipulate them.
Webhook Support: Deploy webhooks to refresh your content when external data is modified.
Database Connections: Connect to databases directly for live data synchronization.
Content Management Integration
Headless CMS Integration: Integrate with headless CMS solutions like Strapi, Contentful or Sanity.
Process form data: Handle the submission of a response to a form and store it in other external systems.
User Authentication: Connect using Third-Party, HOC, and Ask User to Login.
E-commerce Integration: Integrate with e-commerce platforms to use real product data and operations.
Advanced Data Features
Transform Data: Manipulate and transform any API data, before showing it in your designs.
Filtering and Sorting: Build dynamic user interfaces that allow sorting and filtering of live data.
Search: Let your users intuitively find what they are looking for through live search.
Data Visualization: Design charts and graphs that update live with data.
Practical Applications
Portfolio Websites: Dynamically add new work to your portfolio from project management platforms.
E-commerce: Create online shops with actual product databases and stock management features.
Content Sites: Create blogs and content sites that will update themselves with new content.
API Integration Tips
Identify Your Data Sources: Determine what external data you want to integrate.
API Documentation: Study the API documentation for your chosen data sources.
Start Simple: Begin with basic data fetching before moving to complex integrations.
Error Handling: Implement proper error handling for when API calls fail.
Caching Strategy: Develop a caching strategy to improve performance and reduce API calls.
Security Considerations
API Key Management: Properly secure and manage API keys and authentication tokens.
Data Privacy: Ensure compliance with data privacy regulations when handling user data.
Rate Limiting: Implement rate limiting to avoid overwhelming external APIs.
Error Boundaries: Create fallback experiences for when integrations fail.
How These Hidden Features Transform Your Design Process
Framer’s hidden features can transform your design process completely. It’s difficult to understand designs, animations feel limited, and updating them depends on manual work. There’s not much collaboration yet, and responsive design is quite basic.
Once you have the hang of this amazing features, your work will be dynamic and responsive with graceful animations, real-time updates, and fully responsive design. Team work is simplified and productive. But the real magic happens when you start to mix them together: Smart Components + API Integration result in Data Driven Design, Advanced Easing + Code Overrides lead to Pro-level animations and Performance Optimization + Advanced Layouts turn websites into fast SEO-friendly experiences.
Framer Features Implementation Strategy: Your 30-Day Action Plan
Here’s a clean and organized table of 7 hidden framer features implementation strategy: 30-day action plan for every designer:
Week | Days | Focus Area / Tasks | Goal / Outcome |
Week 1: Foundation Building | Days 1–2 | Explore Advanced Easing Controls on existing projects | Understand how easing impacts animation flow and user experience |
Days 3–4 | Create your first Smart Component Variants | Learn how to build reusable, flexible design components | |
Days 5–7 | Experiment with basic Code Overrides | Start combining code logic with visual design for interactivity | |
Week 2: Advanced Techniques | Days 8–10 | Master Layout Grids and Constraints | Ensure designs are responsive and consistent across devices |
Days 11–12 | Set up Team Collaboration workflows | Improve teamwork and streamline design hand offs | |
Days 13–14 | Optimize an existing project for performance | Enhance design efficiency and reduce project load times | |
Week 3: Integration and Dynamics | Days 15–18 | Connect your first API integration | Learn how to bring live data and functionality into Framer |
Days 19–21 | Create a dynamic content project combining multiple features | Build complex, interactive prototypes with real-world logic | |
Week 4: Mastery and Application | Days 22–25 | Apply all features to a comprehensive client project | Test your full skill set on a practical, professional project |
Days 26–28 | Document workflows and create templates | Build efficiency for future projects and ensure reusability | |
Days 29–30 | Share knowledge and get feedback from the design community | Improve through peer review and showcase your expertise |
Framer Features Common Mistakes and How to Avoid Them
1. Feature Overload
Problem: Trying to use every hidden feature in every project.
Solution: Choose features that serve specific project goals, not just because they're impressive.
2. Neglecting Performance
Problem: Getting excited about advanced features while ignoring performance impact.
Solution: Always test performance after implementing new features and optimize accordingly.
3. Poor Documentation
Problem: Not documenting custom overrides and complex component systems.
Solution: Create comprehensive documentation for any advanced implementations.
4. Skipping Testing
Problem: Assuming hidden features work perfectly across all devices and browsers.
Solution: Thoroughly test advanced features on multiple devices and browsers.
5. Working in Isolation
Problem: Not sharing knowledge about hidden features with team members.
Solution: Create team training sessions and knowledge-sharing workflows.
Conclusion
As you can see, the 7 hidden framer features or secrets we've discussed are only the beginning to Framer's capabilities. With advanced easing controls, textures that are pressure sensitive, and layers that are natural, you can add design life to your creative vision with full freedom and control. The difference between a good designer and a great one can be found in API integrations that work seamlessly across devices and an API integration editor that is easy to use.
And never forget, every expert was once a beginner who didn't settle for the basics. It’s exactly these hidden features that are here to be discovered, mastered and utilized for achieving some excellent design work with a real impact.
The future of your design career is hidden in plain sight. Are you ready to find it?
Framer is great for designers who want to create websites without code and gives design freedom too. Although it’s known for its drag-and-drop interface and AI-driven features, Framer has a few hidden tricks that you can use to work smarter and more creatively.
Whether you are a freelancer, a work-from-home web designer or an agency that needs to impress clients, an entrepreneur who is testing your own product concept on potential users or a member of design team at the upstart. We have 7 hidden Framer features most designers never seem to know about but that they really should. Each piece offers real-world samples, application-by-application instructions and tactical methods to take back and use at your job every day.
Why Hidden Framer Features Matter?
Before we start to break down the concrete features, it's key to understand why hunting for and mastering hidden functionality is so important for designers come 2026.
Client Expectations Are Higher: Clients now want more than static designs. They want interactive, immersive experiences that are competitive with the most dominant tech companies.
Competition Is Tougher: As design tools are getting more easily accessible, the standard for professional level work is pushed up. Hidden features help you create work that stands out.
Efficiency Is Everything: In an industry that moves quickly, the designers who can work cleverer not harder are the ones who succeed.
Advantage of these Hidden Framer Features
When you master features that most designers don't know about, you gain:
Unique Capabilities that differentiate your work.
Increased Efficiency in your design workflow.
Professional Credibility with advanced techniques.
Higher Project Value through enhanced functionality.
Now, let's explore the features that will give you this modern age.
Feature 1: Advanced Easing Controls
Most designers use Framer's default animation presets, but where the magic really starts flying is working with your own easing controls. This secret feature is responsible for creating animations of such high quality that most people will mistake them for expensive ones on apps and websites.
What Are Advanced Easing Controls?
The ease of the animations relates to how quickly and slowly the animation moves. With other common easing options missing, you can also use “ease-in” and “ease-out”. Creatures of custom, design your own curve with Framer’s easing controls for a touch of personality and pro polish.
How to Access Advanced Easing
Select any animated element in your Framer project
Open the Animation panel on the right sidebar
Click on the easing dropdown
Look for "Custom" option at the bottom of the list
Click "Custom" to reveal the cubic-bezier curve editor
Practical Applications
Micro-Interactions: Create button hover effects that feel more responsive and engaging than standard easing options.
Page Transitions: Design smooth page changes that feel natural and fluid, improving user experience significantly.
Loading Animations: Build loading indicators that feel purposeful rather than generic, keeping users engaged during wait times.
Pro Tips for Advanced Easing
Study Real-World Motion: Observe how objects move in the physical world and replicate that timing.
Test on Different Devices: Custom easing can perform differently on various devices and browsers.
Save Your Favorites: Create a library of custom easing curves for consistent use across projects.
Start Subtle: Begin with small modifications to standard easing before creating dramatic custom curves.
Real-World Impact
Designers who master advanced easing report 30-40% higher client satisfaction with animation work and faster approval times because animations feel more professional and intentional.
Feature 2: Smart Component Variants
Though most designers are experienced with basic building blocks, Framer’s smart component variants are one of the powerhouse yet under-used features in Framer. This feature enables powerful, dynamic components that adjust smartly to their setting.
What is Smart Component Variants?
Smart Component Variants go beyond simple component instances. They allow you to create one master component with multiple states, sizes, and configurations that can automatically switch between variants based on user interaction or data.
How to Create Smart Component Variants?
Create your base component- button, card, or navigation element
Right-click the component and select "Create Component Variant"
Modify the variant - change colors, text, size, or layout
Repeat for additional variants - hover states, active states, different sizes
Set up variant properties in the component panel - state, size, type
Configure automatic switching between variants using interaction triggers
Advanced Variant Techniques
Variants within variants: Create components where several properties may be mixed and matched.
Variant Based on Data Driven: Automatically choose which variant to show based on external data.
Responsive Variants: Be able to restructure components rather than just changing in size for different screen sizes.
Interactive Variants: Construct components with 1 to many states that change in response to user interaction.
Practical Use Cases
Navigation Systems: Create navigation bars that automatically adapt to different page contexts and user states
Product Cards: Design e-commerce cards that show different information based on product type, availability, or user preferences
Form Elements: Build form components that provide real-time feedback and validation states
Dashboard Widgets: Create data visualization components that adapt their display based on the type and amount of data
Component Variant Best Practices
Plan Your Variants: Before building, map out all the states and configurations you'll need
Use Consistent Naming: Develop a naming convention for variant properties that scales across your design system
Test All Combinations: Ensure every possible combination of variant properties works correctly
Document Your System: Create guidelines for how team members should use your component variants
Feature 3: Code Overrides – Bridging Design and Development
One of Framer's most powerful features is Code Overrides. It’s a functionality that allows designers to add custom behavior and advanced interactivity without leaving the Framer environment.
What Are Code Overrides?
Code Overrides are little JavaScript functions you can apply to any layer or component in Framer. This allows you to do even more than point and click. Consider them superpowers for your design elements.
How to Accessing Code Overrides?
Select any layer or component in your design
Look for the "Code" section in the right properties panel
Add a New Override to build a custom function
Write your JavaScript within the newly opened code editor
Apply it and instantly see your override in action
Beginner-Friendly Override Examples
Dynamic Text: Dynamically update reusable components on the fly based on runtime data or user interaction
Count down or user interactions: Create anything that counts: users, space characters, animations
Validation: Real time form validation is more than just basic HTML required
Data Integrations: Import live data from APIs to give your prototypes a sense of reality and action
Advanced Override Applications
Complex animations: make animations based on the scroll position, mouse movement or device orientation
State Management: Create components that can remember user preferences and adjust accordingly
Integrations: Integrate with third-party services such as payment providers, analytics engines, or social APIs
Custom Physics: Create your own interactive physics, drag and drop interaction, collision detection or particle effects
Why Code Overrides Matter?
Prototype Fidelity: Create prototypes that behave almost identically to final products
Client Presentations: Demonstrate complex functionality without building a full application
Design Validation: Test interaction concepts before involving developers
Personal Growth: Bridge the gap between design and development skills
Code Overrides Tips
Start Small: Begin with simple text or style modifications
Use Documentation: Framer provides extensive documentation and examples
Join Communities: Connect with other designers using code overrides
Practice Regularly: Spend at least 1 hour a week playing with new override ideas
Feature 4: Layout Grids and Constraints
Basic responsive design is something most designers have heard of, but Framer's advanced layout grid and constraint systems take control over how your designs behave on a device -and screen size- to another level.
Beyond Basic Responsive Design
Traditional responsive design may use very basic breakpoints and some simple scaling. Framer's sophisticated layout system enables you to redefine your designs as truly adaptive layouts, remixing, prioritizing and demoting content based on available space and device capability.
Advanced Grid Systems
CSS Grid Integration: Framer’s grid system is powered by CSS Grid, providing you with advanced layouts options such as grid template areas, fractional units and automatic content placement.
Fluid Grids: Design grids that can be rearranged based on the number of columns, row heights, and spacing in each grid to match content amount as well as screen size.
Nested Grids: Use nested grids to build complex layouts while maintaining complete control over the responsiveness of each grid system independently.
Mastering Constraints
Relative Constraint: Positioning of objects relative to more than one reference.
Content-aware sizing: Create objects that resize automatically with the content try to keep design integrity.
Proportional Relationships: Create relationships between parts that retain visual hierarchy at all screen sizes.
Advanced Layout Techniques
Layout concept Priority-based hiding: Decide for which elements you want to hide or show based on available space and try that you keep your most important content always visible.
Reflowing Content: Develop layouts that automatically flows and re-positions content to pack the most available space.Organize your layout based on time-series data.
Contextual Styling: Elements that change the way they look depending on where they are in a layout grid.
Practical Implementation
Real World Dashboard Layouts: Construct admin panels and dashboards that look good, work well on all handheld devices, display beautifully at various screen sizes and data densities.
E-commerce Grids: Building product grids that will automatically convert better on any device.
Content Layouts: Build gorgeous blog and content layouts to best support your stories, regardless of display size.
Navigation Systems: Build navigation that intelligently adapts its layout and functionality based on available space.
Layout Best Practices
Content-First Approach: Design your layout system around your actual content, not arbitrary breakpoints.
Test Real Data: Use actual content and data when testing your layout systems.
Performance Considerations: Ensure your advanced layouts don't negatively impact loading times.
Accessibility Focus: Make sure your responsive layouts maintain accessibility standards across all device.
Feature 5: Team Collaboration Features
Most designers think of Framer as a solo design tool, but its advanced collaboration features can transform how design teams work together, dramatically improving productivity and design quality.
Version Control and Branching
Design Branching: Similar to Git for developers, Framer allows you to create branches of your design for experimental features or alternative approaches.
Merge Capabilities: Safely merge different design branches while preserving the integrity of your main design files.
Version History: Access detailed version history with the ability to restore any previous state of your design.
Change Tracking: See exactly what changed between versions, who made the changes, and when.
Advanced Commenting and Review Systems
Contextual Comments: Leave comments attached to specific elements, states, or interactions rather than just general feedback.
Comment Threading: Engage in detailed discussions about specific design decisions directly within the design file.
Task Assignment: Convert comments into actionable tasks with due dates and assignees.
Review Workflows: Set up formal review processes with approval gates and stakeholder sign-offs.
Real-Time Collaboration Features
Live Cursors: See where other team members are working in real-time, avoiding conflicts and enabling seamless collaboration.
Simultaneous Editing: Multiple team members can work on different parts of the same design simultaneously.
Component Library Syncing: Maintain consistency across team members with automatically synced component libraries and design systems.
Cross-Project Sharing: Share components, styles, and interactions across multiple projects and team members.
Team Management Tools
Role-Based Permissions: Control who can edit, comment, or view different parts of your design projects.
Client Access Controls: Provide clients and stakeholders with appropriate access levels without compromising your work.
Activity Feeds: Stay updated on all team activity with comprehensive activity feeds and notifications.
Integration Capabilities: Connect Framer with project management tools, communication platforms, and development workflows.
Collaboration Best Practices
Establish Workflows: Define clear processes for how your team will use collaboration features.
Communication Standards: Set up guidelines for effective commenting and feedback within Framer.
File Organization: Create consistent naming and organization systems that work for all team members.
Regular Reviews: Schedule regular team reviews using Framer's collaboration tools to maintain design quality and alignment.
Feature 6: Performance Optimization Tools
Hidden within Framer's interface are powerful performance optimization tools that can dramatically improve your website's loading speed and user experience – crucial factors for both user satisfaction and SEO ranking. If your confused about Framer SEO, read here for more details: Framer SEO 101: Tools, Settings & Tips.
Asset Optimization Features
Automatic Image Compression: Framer automatically optimizes images for web delivery, but you can access advanced controls for fine-tuning.
Format Selection: Choose optimal image formats (WebP, AVIF) based on browser support and quality requirements.
Lazy Loading Controls: Configure which images and elements load immediately versus on-demand as users scroll.
Progressive Loading: Set up progressive image loading for better perceived performance.
Code Optimization
Unused CSS Detection: Identify and remove unused CSS styles that bloat your website's loading time.
JavaScript Bundling: Control how your custom code and overrides are bundled and delivered to browsers.
Critical Path Optimization: Prioritize the loading of above-the-fold content for faster perceived performance.
Caching Strategies: Configure browser caching for static assets to improve return visitor performance.
Advanced Performance Features
Preloading Controls: Specify which resources should be preloaded based on user behavior patterns.
Resource Prioritization: Set loading priorities for different types of content based on their importance to user experience.
Performance Budgets: Set performance targets and get warnings when your designs exceed them.
Real-Time Performance Monitoring: Monitor your site's performance metrics directly within Framer.
Mobile Performance Optimization
Touch Target Sizing: Ensure all interactive elements meet mobile usability guidelines.
Gesture Optimization: Optimize gestures and interactions for mobile devices.
Battery Usage Considerations: Design animations and interactions that don't drain device batteries.
Network Adaptation: Configure how your site adapts to different network conditions.
Performance Measurement Tools
Built-in Analytics: Access performance metrics directly within Framer without external tools.
Core Web Vitals Tracking: Monitor Google's Core Web Vitals metrics that impact SEO rankings.
User Experience Metrics: Track real user experience data to identify performance bottlenecks.
Comparative Analysis: Compare your site's performance against industry benchmarks and competitors.
Optimization Best Practices
Performance-First Design: Consider performance implications during the design phase, not just at the end.
Regular Audits: Conduct regular performance audits to catch issues before they impact users.
Mobile Priority: Always prioritize mobile performance given the majority of web traffic.
Continuous Monitoring: Set up ongoing performance monitoring to catch regressions quickly.
Feature 7: API Integration and Dynamic Content
It is the most powerful "secret" in Framer to work with live data and API integrations. That makes static designs feel like living apps powered by actual content.
Dynamic content enables your Framer projects to show actual, live data from outside the workspace. This makes your prototypes and websites real or new looking instead of templates.
API Integration Capabilities
Support for REST API: Integrate with any REST API to fetch and display live data in your designs.
Integrate with GraphQL: Access your data for more optimized pulling and manipulate them.
Webhook Support: Deploy webhooks to refresh your content when external data is modified.
Database Connections: Connect to databases directly for live data synchronization.
Content Management Integration
Headless CMS Integration: Integrate with headless CMS solutions like Strapi, Contentful or Sanity.
Process form data: Handle the submission of a response to a form and store it in other external systems.
User Authentication: Connect using Third-Party, HOC, and Ask User to Login.
E-commerce Integration: Integrate with e-commerce platforms to use real product data and operations.
Advanced Data Features
Transform Data: Manipulate and transform any API data, before showing it in your designs.
Filtering and Sorting: Build dynamic user interfaces that allow sorting and filtering of live data.
Search: Let your users intuitively find what they are looking for through live search.
Data Visualization: Design charts and graphs that update live with data.
Practical Applications
Portfolio Websites: Dynamically add new work to your portfolio from project management platforms.
E-commerce: Create online shops with actual product databases and stock management features.
Content Sites: Create blogs and content sites that will update themselves with new content.
API Integration Tips
Identify Your Data Sources: Determine what external data you want to integrate.
API Documentation: Study the API documentation for your chosen data sources.
Start Simple: Begin with basic data fetching before moving to complex integrations.
Error Handling: Implement proper error handling for when API calls fail.
Caching Strategy: Develop a caching strategy to improve performance and reduce API calls.
Security Considerations
API Key Management: Properly secure and manage API keys and authentication tokens.
Data Privacy: Ensure compliance with data privacy regulations when handling user data.
Rate Limiting: Implement rate limiting to avoid overwhelming external APIs.
Error Boundaries: Create fallback experiences for when integrations fail.
How These Hidden Features Transform Your Design Process
Framer’s hidden features can transform your design process completely. It’s difficult to understand designs, animations feel limited, and updating them depends on manual work. There’s not much collaboration yet, and responsive design is quite basic.
Once you have the hang of this amazing features, your work will be dynamic and responsive with graceful animations, real-time updates, and fully responsive design. Team work is simplified and productive. But the real magic happens when you start to mix them together: Smart Components + API Integration result in Data Driven Design, Advanced Easing + Code Overrides lead to Pro-level animations and Performance Optimization + Advanced Layouts turn websites into fast SEO-friendly experiences.
Framer Features Implementation Strategy: Your 30-Day Action Plan
Here’s a clean and organized table of 7 hidden framer features implementation strategy: 30-day action plan for every designer:
Week | Days | Focus Area / Tasks | Goal / Outcome |
Week 1: Foundation Building | Days 1–2 | Explore Advanced Easing Controls on existing projects | Understand how easing impacts animation flow and user experience |
Days 3–4 | Create your first Smart Component Variants | Learn how to build reusable, flexible design components | |
Days 5–7 | Experiment with basic Code Overrides | Start combining code logic with visual design for interactivity | |
Week 2: Advanced Techniques | Days 8–10 | Master Layout Grids and Constraints | Ensure designs are responsive and consistent across devices |
Days 11–12 | Set up Team Collaboration workflows | Improve teamwork and streamline design hand offs | |
Days 13–14 | Optimize an existing project for performance | Enhance design efficiency and reduce project load times | |
Week 3: Integration and Dynamics | Days 15–18 | Connect your first API integration | Learn how to bring live data and functionality into Framer |
Days 19–21 | Create a dynamic content project combining multiple features | Build complex, interactive prototypes with real-world logic | |
Week 4: Mastery and Application | Days 22–25 | Apply all features to a comprehensive client project | Test your full skill set on a practical, professional project |
Days 26–28 | Document workflows and create templates | Build efficiency for future projects and ensure reusability | |
Days 29–30 | Share knowledge and get feedback from the design community | Improve through peer review and showcase your expertise |
Framer Features Common Mistakes and How to Avoid Them
1. Feature Overload
Problem: Trying to use every hidden feature in every project.
Solution: Choose features that serve specific project goals, not just because they're impressive.
2. Neglecting Performance
Problem: Getting excited about advanced features while ignoring performance impact.
Solution: Always test performance after implementing new features and optimize accordingly.
3. Poor Documentation
Problem: Not documenting custom overrides and complex component systems.
Solution: Create comprehensive documentation for any advanced implementations.
4. Skipping Testing
Problem: Assuming hidden features work perfectly across all devices and browsers.
Solution: Thoroughly test advanced features on multiple devices and browsers.
5. Working in Isolation
Problem: Not sharing knowledge about hidden features with team members.
Solution: Create team training sessions and knowledge-sharing workflows.
Conclusion
As you can see, the 7 hidden framer features or secrets we've discussed are only the beginning to Framer's capabilities. With advanced easing controls, textures that are pressure sensitive, and layers that are natural, you can add design life to your creative vision with full freedom and control. The difference between a good designer and a great one can be found in API integrations that work seamlessly across devices and an API integration editor that is easy to use.
And never forget, every expert was once a beginner who didn't settle for the basics. It’s exactly these hidden features that are here to be discovered, mastered and utilized for achieving some excellent design work with a real impact.
The future of your design career is hidden in plain sight. Are you ready to find it?

Read more articles

Feb 28, 2026
Best Framer Templates with Parallax Scrolling
Feb 28, 2026
Best Framer Templates with Parallax Scrolling

Feb 22, 2026
Framer Canvas: Design Without Limits
Feb 22, 2026
Framer Canvas: Design Without Limits
Feb 19, 2026
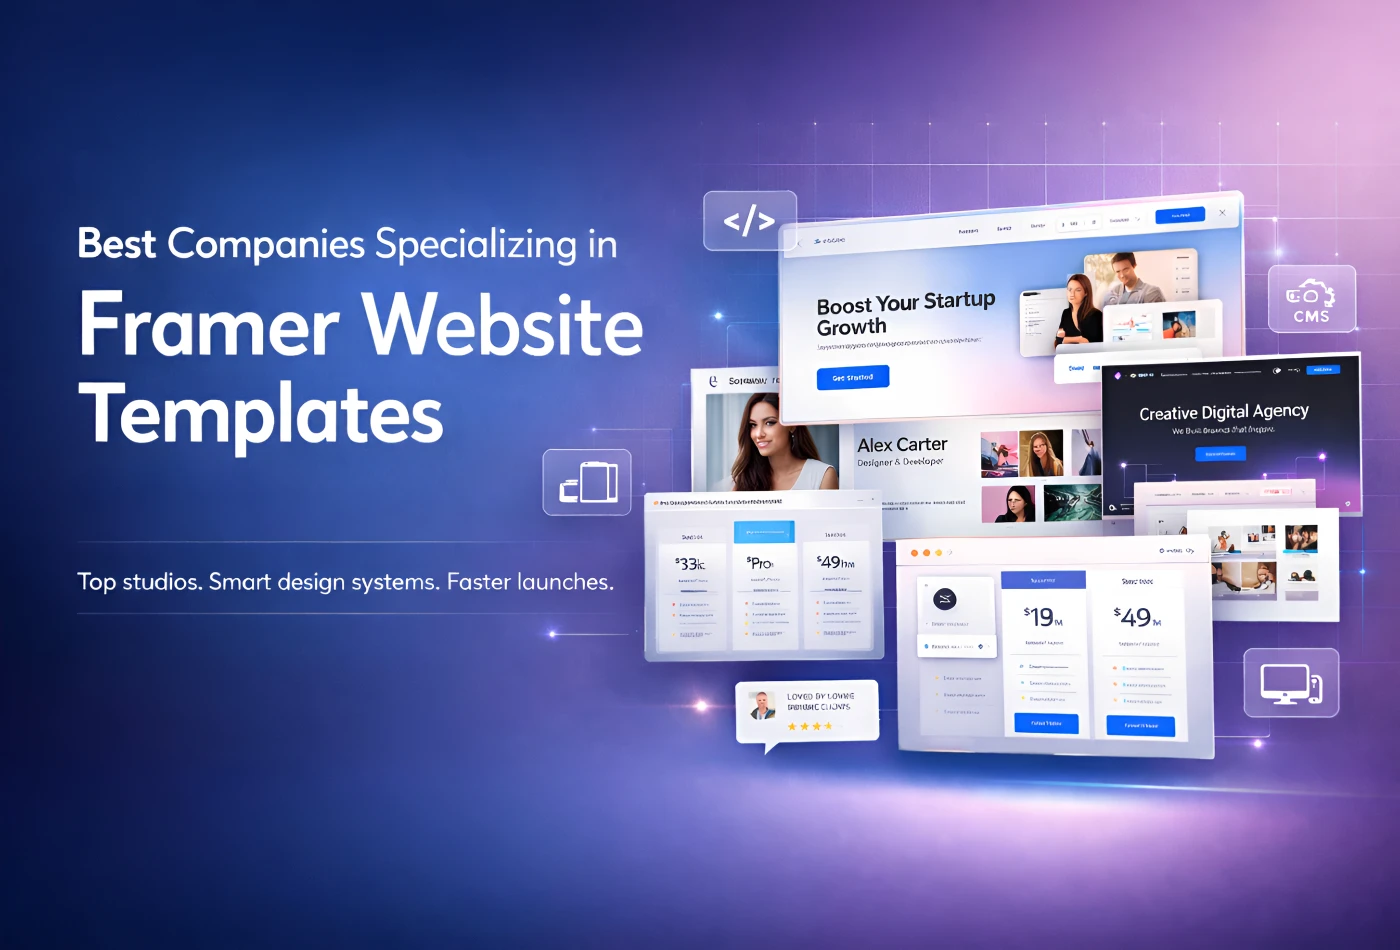
Best Companies Specializing in Framer Website Templates in 2026
Feb 19, 2026
Best Companies Specializing in Framer Website Templates in 2026
Get exclusive 10% discount on your next purchase.
We will send the discount code immediately in your inbox.

Templates
Copyright © 2026 FramerBite, A Part of Creetfy LLC. All Rights Reserved
Follow us on Twitter
Get exclusive 10% discount on your next purchase.
We will send the discount code immediately in your inbox.
Templates
Copyright © 2026 FramerBite, A Part of Creetfy LLC. All Rights Reserved
Follow us on Twitter
Get exclusive 10% discount on your next purchase.
We will send the discount code immediately in your inbox.
Templates
Copyright © 2026 FramerBite, A Part of Creetfy LLC. All Rights Reserved
Follow us on Twitter
Get exclusive 10% discount on your next purchase.
We will send the discount code immediately in your inbox.
Templates
Copyright © 2026 FramerBite, A Part of Creetfy LLC. All Rights Reserved
Follow us on Twitter